Online:Coldharbour
|
||||
|---|---|---|---|---|
| Neutral | ||||
| Zone Story Quests | 11 | |||
| Wayshrines | 13 | |||
| Delves | 6 | |||
| Points of Interest | 19 | |||
| Striking Locales | 7 | |||
| Set Stations | 2 | |||
| Public Dungeons | 1 | |||
| Group Dungeons | 1 | |||
| World Bosses | 6 | |||
| Skyshards | 16 | |||
| Player Hub | ||||
| The Hollow City | ||||
| Notable Treasure | ||||
| Coldharbour Antiquities | ||||
| Regions | ||||
| Shrouded Plain, Fist of Stone, Black Garrison | ||||
| Location | ||||
| Oblivion | ||||
| Loading Screen | ||||
 The dreadful Oblivion plane of Coldharbour is a place of death, despair, and infinite cruelty. It is ruled by Molag Bal, the Lord of Brutality and Domination, a Daedric Prince dedicated to enslaving all the mortals of Nirn.
|
||||
| Achievements • Antiquities • Books • Fish | ||||

Coldharbour is Molag Bal's realm of Oblivion. The Prince is attempting to pull Nirn into his realm through the use of Dark Anchors.
Parts of Coldharbour are visited during the main quest. You get access to the main region by finishing The Weight of Three Crowns and the northern region during Crossing the Chasm.
For more information on Coldharbour, see the lore article.
Places[edit]
Delves[edit]
 Aba-Loria — An Ayleid ruin in central Coldharbour, east of the Spurned Peak containing Worm Cultists and skeletons. (map)
- The Cave of Trophies — A cave containing Daedra in central Coldharbour, just southeast of the Cliffs of Failure. (map)
- The Vault of Haman Forgefire — An ancient Nordic ruin in southeastern Coldharbour, north of the Everfull Flagon containing draugr and flame atronachs. (map)
- The Grotto of Depravity — A cave in southern Coldharbour, southwest of the Hollow City containing Daedra. (map)
- Mal Sorra's Tomb — A Dunmer tomb in central Coldharbour, southwest of the Orchard containing undead. (map)
- The Wailing Maw — A cave in northeastern Coldharbour, northeast of the Lost Fleet containing Daedra. (map)
Points of Interest[edit]
 The Black Forge — A Daedric ruin in eastern Coldharbour. (map)
 The Chasm — A battlefield in central Coldharbour, just north of the Hollow City. (map)
- Cliffs of Failure — A battlefield in eastern Coldharbour, north of the Court of Contempt. (map)
- Court of Contempt — A Daedric ruin in Coldharbour, northeast of the Hollow City. (map)
- The Endless Stair — Molag Bal's citadel in northern Coldharbour. (map)
 The Everfull Flagon — A tavern in southeastern Coldharbour. (map)
- The Great Shackle — A Daedric ruin in eastern Coldharbour. (map)
- Haj Uxith — An Argonian village in southwestern Coldharbour, southwest of the Library of Dusk. (map)
 The Hollow City — A city in central Coldharbour. (map)
 Library of Dusk — An Ayleid ruin in southern Coldharbour, west of the Hollow City. (map)
- The Lightless Oubliette — A Daedric ruin in western Coldharbour. (map)
 The Lost Fleet — A ship graveyard in northeastern Coldharbour. (map)
- The Manor of Revelry — A Daedric ruin in northern Coldharbour, northwest of the Orchard. (map)
 The Moonless Walk — A forest in western Coldharbour, east of the Lightless Oubliette. (map)
 The Orchard — A large cemetery in central Coldharbour, across the Chasm north of the Hollow City. (map)
 The Reaver Citadel — A fortress in northern Coldharbour which was once a city in Tamriel. (map)
- Spurned Peak — A mountain in northwestern Coldharbour. (map)
 Tower of Lies — A mine in central Coldharbour, northwest of the Hollow City. (map)
 The Vile Laboratory — An emulated Dwemer ruin in southern Coldharbour, southeast of the Hollow City. (map)
Striking Locales[edit]
 Cadwell's Hovel — Located south of the Hollow City in southern Coldharbour. (map)
- Endless Overlook — Located east of the Endless Stair in northern Coldharbour. (map)
- Fighters Guildhall — Located in the northeast corner of the Hollow City. (map)
- Forsaken Village — Located northwest of the Hollow City in central Coldharbour. (map)
- Mages Guildhall — The Mages Guild's base of operations in the Hollow City. (map)
- Shrine of Kyne — Located southeast of The Everfull Flagon in southeastern Coldharbour. (map)
- Survivor's Camp — Located east of the Reaver Citadel in northern Coldharbour. (map)
Set Stations[edit]
 Deathspinner's Lair — The site of a ruined windmill in Coldharbour. (map)
- Font of Schemes — A Daedric ruin in western Coldharbour. (map)
Public Dungeons[edit]
 Village of the Lost — A plane containing three villages trapped between Coldharbour and Mundus. (map)
Group Dungeons[edit]
 Vaults of Madness — A group dungeon found in Coldharbour. (map)
World Bosses[edit]
 Aba-Darre — An Ayleid well in northwestern Coldharbour, east of Spurned Peak. (map)
- Cynhamoth's Grove — A crypt in northern Coldharbour, west of the Orchard. (map)
- Daedroth Larder — A burned out house in central Coldharbour, just northwest of the Court of Contempt. (map)
- Duriatundur's Killing Field — A clearing in northwestern Coldharbour, just north of the Moonless Walk. (map)
- Risen Court — A ritual site in northern Coldharbour, just east of the Manor of Revelry. (map)
- Zemarek's Hollow — A small Dwemer ruin in central Coldharbour, just east of the Vile Laboratory. (map)
Player Houses[edit]
 Coldharbour Surreal Estate — A player manor located in Coldharbour. (map)
Wayshrines[edit]
 The Chasm Wayshrine — Located just south of the Chasm. (map)
- Court of Contempt Wayshrine — Located east of the Court of Contempt. (map)
- Endless Stair Wayshrine — Located south of the Endless Stair. (map)
- Everfull Flagon Wayshrine — Located northwest of the Everfull Flagon. (map)
- Great Shackle Wayshrine — Located just west of the Great Shackle. (map)
- Haj Uxith Wayshrine — Located east of Haj Uxith. (map)
- Hollow City Wayshrine — Located in the west of the Hollow City, near the exit to the Shrouded Plain. (map)
- Library of Dusk Wayshrine — Located northwest of the Library of Dusk. (map)
- Manor of Revelry Wayshrine — Located just outside of the Manor of Revelry. (map)
- Moonless Walk Wayshrine — Located west-northwest of the Moonless Walk. (map)
- The Orchard Wayshrine — Located south of the Orchard. (map)
- Reaver Citadel Wayshrine — Located south of the Reaver Citadel. (map)
- Shrouded Plains Wayshrine — Located north of the Tower of Lies in western Coldharbour. (map)
Unmarked Locations[edit]
- The Planar Vortex — A realm linked to Coldharbour via the Endless Stair. (map)
Strongholds[edit]
These strongholds are visited during the Main Quest, and are located elsewhere in the realm of Coldharbour. They cannot be accessed directly from the Coldharbour zone.
- Castle of the Worm — Mannimarco's stronghold in Coldharbour.
- The Foundry of Woe — A prison stronghold in Coldharbour.
- Halls of Torment — A prison stronghold in Coldharbour.
- Heart's Grief — Molag Bal's palace and the most feared place in all Coldharbour.
- The Wailing Prison — A sub-location of Coldharbour, Molag Bal's realm of Oblivion.
This stronghold is visited during the Fighters Guild questline.
- Halls of Submission — A stronghold in Coldharbour where Molag Bal has hidden the Mortuum Vivicus.
Quests[edit]
Quest Map[edit]
Key[edit]
| Paths always enter a quest from the top or left, and leave a quest from the bottom or right. | |||||||
| Denotes a requisite path or quest. You must complete this before starting the subsequent quest. | |||||||
| Denotes an optional path or quest. The subsequent story quest can be started without this being completed. | |||||||
| Denotes an exclusive path or quest. Only one of the connected quests is required, and only one can be completed. | |||||||
| Denotes a quest which is part of the main story chain. | |||||||
| Denotes a story quest which is required for Radiant Champion. | |||||||
| Denotes a missable pointer quest which is part of the main chain. | |||||||
| Denotes a missable pointer quest which is on an alternate path. | |||||||
| Denotes a side quest which is required for Meridia's Lightbearer. | |||||||
| Denotes a quest which rewards a Skill Point. | |||||||
Army of Meridia Story Quests[edit]
 The Hollow City: Set up a base of operations in the Hollow City.
- The Army of Meridia: Build an army to take on a Daedric Prince.
- Into the Woods: Search a dark forest for signs of the Fighters Guild.
- An Unusual Circumstance: Rescue the lamias' children from the savage Wood Elves.
- The Shadow's Embrace: Convince the Shadow Walkers to break their pact with Molag Bal.
- Light from the Darkness: Free the Last Ayleid King.
- Vanus Unleashed: Prevent the Daedra from using Galerion's essence to power the Planemeld.
- Breaking the Shackle: Destroy Molag Bal's Great Shackle.
- Crossing the Chasm: Secure the Chasm and gain access to Molag Bal's personal domain.
- The Harvest Heart: Eliminate or ally with the enslaved vampires of the Orchard.
- The Citadel Must Fall: Storm the Dremora defenses to reach the Endless Stair.
- The Final Assault: Launch an assault on the Endless Stair and destroy the Planar Vortex.
Shrouded Plain Side Quests[edit]
- The Library of Dusk: Break the illusory effects of the library's magicka matrix.
- The Lost Lute: Return a musical instrument to its owner.
- Through the Daedric Lens: Gain access to a dangerous Daedric library.
- Truth, Lies, and Prisoners: Jump into a deep pit and help rescue the prisoners there.
- Saving Stibbons: Rescue the hapless manservant from a beautiful Daedra.
- Wisdom of the Ages: Reconcile the scholars and warriors of an ancient Argonian settlement.
Black Garrison Side Quests[edit]
- The Endless War: Participate in the Observer's game to win the mages' freedom.
- EITHER A Bargain With Shadows: Join forces with Estre to win the Battle of the Cliffs.
- OR A Thorn in Your Side: Join forces with Angof to win the Battle of the Cliffs.
- OR The Will of the Worm: Join forces with Thallik to win the Battle of the Cliffs.
- Hall of Judgment: Rescue Mages Guild members from Coldharbour's justice.
- Holes in the World: Escort Mezha-dro on his mission to seal tears in Oblivion.
- A Misplaced Pendant: Return a lost pendant to its owners.
- The Soul-Meld Mage: Help separate the souls of Gadris and Zur.
- Soul Survivors: Free village leaders from Coldharbour's clutches.
- Special Blend: Investigate the alluring mead at a Coldharbour tavern.
Fist of Stone Side Quests[edit]
- The Anguish Gem: Destroy a powerful soul gem to disrupt Molag Bal's research.
- Between Blood and Bone: Recover the Crown of Bones and remove the curse of the Lost Fleet.
- A Graveyard of Ships: Investigate the lost fleet of the All-Flags Navy.
- News of Fallen Kin: Inform a Nord that his cousin has been killed.
- Old Bones: Assemble a body for the talking skull of a sailor.
- What the Heart Wants: Rescue the wayward manservant from another life-threatening situation.
Dungeon Quests[edit]
 Mind of Madness: Escape a labyrinthine structure in Coldharbour.
Vaults of Madness Pledge: Explore the Vaults of Madness and return Undaunted.(disabled since Patch 2.6.4)- Pledge: Vaults of Madness: Prove you are truly Undaunted by clearing the Vaults of Madness.
Skyshards[edit]
| Clue | Location | Notes | |
|---|---|---|---|
| East of the bastion of deceit. | At the bottom of the Tower of Lies, near the water | (map) | When you enter this area, you will not be able to escape via normal means without finishing the quest here. |
| Discarded from the mages' walls. | South of the Mages Guildhall outside of the city | (map) | |
| Seek a shattered bridge suspended. | Outside The Lightless Oubliette, west of Moonless Walk Wayshrine, in the water | (map) | |
| Unfit for court. | Just outside the south wall of the Court of Contempt | (map) | |
| Ejected from the Village. | Southwest of Village of the Lost, in the water | (map) | |
| Among the vessel's burnt cousins. | Near the Everfull Flagon Tavern, surrounded by Soul Shriven | (map) | |
| In the Chasm's western watchtower. | In the Chasm, west of portal | (map)† | |
| Not invited into the plotting wives' home. | Outside the Manor of Revelry, behind the broken wall | (map)† | |
| Washed to strange shores with the fleet. | At the Lost Fleet, go through the Coral Tower Tunnel to the other end. Exiting the tunnel turn right, skyshard is in the water on coral. | (map)† | You cannot enter the Coral Tower Tunnel without starting the Between Blood and Bone quest. However, it is possible to reach the top of the tower by climbing up a fallen mast just west of The Wailing Maw. You will probably need Major Expedition or some other Movement Speed improvement to make the jump. Sorcerers can use Bolt Escape instead. |
| Among the bones of Aba-Loria. | Aba-Loria, side room downstairs after coming out of the main room. | (map) | |
| Enduring Forgefire's flames. | The Vault of Haman Forgefire, top room in lava | (map) | |
| Seek the deepest depravity. | The Grotto of Depravity, top left, in the water | (map) | |
| Entombed in the Orchard. | Mal Sorra's Tomb, large room left of the entrance | (map)† | |
| One of the hunters' many prides. | The Cave of Trophies, bottom room on the left, full of Clannfear and Dremora | (map) | |
| Where endless cries issue forth. | The Wailing Maw, big room, bottom right with Frost Atronach | (map)† | |
| Behind disaster-claimed Dunmer hall. | Village of the Lost, western side of the 'Ruins of Silver Run' island | (map) | |
Sets[edit]
Overland[edit]
| Set Name | Bonuses | Armor Weight |
|---|---|---|
| Prisoner's Rags |
2 items: Adds 25-1096 Maximum Stamina |
Light Armor |
| Stygian |
2 items: Adds 3-129 Weapon and Spell Damage |
Medium Armor |
| Meridia's Blessed Armor |
2 items: Adds 34-1487 Armor |
Heavy Armor |
Dungeon[edit]
| Set Name | Bonuses | Location(s) | Set Type |
|---|---|---|---|
| The Worm's Raiment |
2 items: Adds 3-129 Magicka Recovery |
Vaults of Madness | Light Armor |
| Oblivion's Edge |
2 items: Adds 15-657 Critical Chance |
Vaults of Madness | Medium Armor |
| Rattlecage |
2 items: Adds 28-1206 Maximum Health |
Vaults of Madness | Heavy Armor |
| Grothdarr |
1 item: Adds 25-1096 Maximum Magicka |
Vaults of Madness | Monster Helm Sets |
Crafted[edit]
| Set Name | Traits Needed | Bonuses | Crafting Site |
|---|---|---|---|
| Oblivion's Foe | 8 |
2 items: Adds 3-129 Weapon and Spell Damage |
Font of Schemes |
| Spectre's Eye | 8 |
2 items: Adds 34-1487 Armor |
Deathspinner's Lair |
Notes[edit]
- Before One Tamriel, each Alliance had its own instance of Coldharbour.
- You can gain early access to Coldharbour by teleporting to a guildmember who is in the zone, which enables the Hollow City Wayshrine.
- There are several mounts themed after Coldharbour: the Black Forge Iron Senche, the Planemeld Courser, and the Cursebound Sabre Cat Prowler.
- The Prophet's cell in the Wailing Prison is protected by a seal, on which Daedric symbols spell out "DEATH" and "FEAR". On the large concentric arches that make up the front of the Prophet's cell, other Daedric symbols spell out (from inner to outer) "TORTURE", "OBLIVION" and "SLAVERY". Those same symbols can be seen inside the Prophet's cell.
Maps[edit]

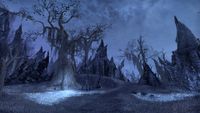
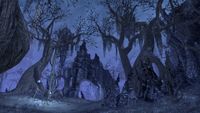
Gallery[edit]
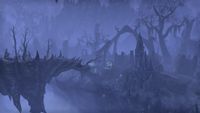
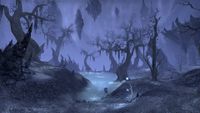
The Nordic ruin south of the Hollow City
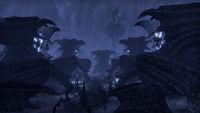
The Daedric structures located outside the Hollow City's eastern gate
Northeast of the Library of Dusk
Southeast of the Moonless Walk
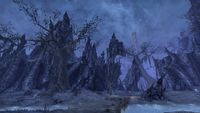
East of the Daedroth Larder
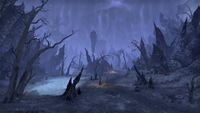
Between the Moonless Walk and the Spurned Peak.
The road leading south of the Everfull Flagon Wayshrine
The sky above Coldharbour
.jpg)


