User:Biffa/sandbox/7
This article is about the area of Castle Volkihar used by the Volkihar vampire clan. For the dungeon area of the castle, see Castle Volkihar.
|
|||
|---|---|---|---|
| Added by | Dawnguard | ||
| # of Zones | 2 | ||
| Clearable | No | ||
| Respawn Time | 10 days | ||
| Level | Min: 10 | ||
| Occupants | |||
| Volkihar Vampire Clan | |||
| Important Treasure | |||
| Bone Hawk Ring Werewolf Pelt |
|||
| Console Location Code(s) | |||
| DLC1VampireCastleGuildhall, DLC1VampireCastleBossRoom | |||
| Region | |||
| Haafingar | |||
| Location | |||
| Northwest of Solitude | |||
| Special Features | |||
| # of Alchemy Labs | 2 | ||
| # of Arcane Enchanters | 2 | ||
| # of Tanning Racks | 1 | ||
| # of Forges/Anvils | 1 | ||
| # of Grindstones | 1 | ||
| # of Workbenches | 1 | ||
| # of Cooking Pots/Spits | 1 | ||
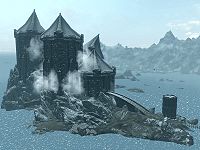
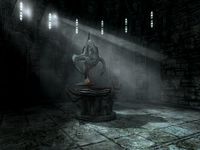
7 is the home of the Volkihar vampire clan in Skyrim, located at Castle Volkihar on an island far west of Solitude.
Though you can travel to the island immediately upon installing the Dawnguard add-on, the keep is initially inaccessible. You must work with the Dawnguard vampire hunters for a short time in order to gain entry, even if you wish to side with the Volkihar vampire clan during the add-on's main questline. Once you locate Serana, she asks you to take her here. After reaching the island with her you will be able to gain entrance to the keep by crossing the bridge leading to the main entrance.
All items in the keep will respawn after ten days away from the castle.
Residents[edit]
|
|
* The presence of these people in this location is affected by quests and/or your choices in gameplay.
Related Quests[edit]
Main Quests[edit]
- Bloodline: Choose your side!
- The Bloodstone Chalice: Fill the Bloodstone Chalice from the Bloodspring at Redwater Den.
- Prophet: The time of prophecy has arrived! Locate a Moth Priest for the vampires.
- Seeking Disclosure: Bring the Elder Scrolls to Dexion.
- Chasing Echoes: Explore Castle Volkihar.
- Unseen Visions: Perform a ceremony to read the Elder Scroll.
- Kindred Judgment: Confront Lord Harkon.
Radient Quests[edit]
- Amulets of Night Power: Retrieve the Amulets of Night Power. (radiant)
- Ancient Power: Retrieve vampire parts from varied locations around Skyrim. (radiant)
- Culling the Beast: Kill the thin-blooded vampires. (radiant)
- Deceiving the Herd: Frame the Dawnguard for murder. (radiant)
- Destroying the Dawnguard: Kill the Dawnguard leaders.
- The Gift: Turn your spouse into a creature of the night.
- The Hunt: Kill the Dawnguard spy. (radiant)
- New Allegiances: Turn the target into a vampire. (radiant)
- Protecting the Bloodline: Destroy a vampire before it turns its allies. (radiant)
- Rings of Blood Magic: Retrieve the Ring of the Erudite and the Ring of The Beast. (radiant)
Walkthrough[edit]
Exterior[edit]
The first time you visit the island, you will have to either swim or find Icewater jetty, located southwest of Northwatch keep and use the rowboat to row across to the jetty on the island. Once you have discovered the castle, future visits can then also be made by fast-travelling directly there. If you decide to side with the Volkihar vampires during the questline, Dawnguard scouts will occasionally be encountered by the jetty on the island or at the top of the tower to the right of the jetty. The tower contains nothing else of interest. There are several bone hawks circling in the sky over the castle, shooting and harvest three of them provide the necessary materials in order to forge a bone hawk amulet. Along the shore there are many crates and other debris from shipwrecks. On the beaches, there are also many tufts of spiky grass, a few clams and at least one cluster of Nordic barnacles. If you follow the western shoreline around the castle, you will come to an old docks guarded by four leveled skeletons, which are significantly tougher than regular skeletons and appear to be wearing armor. Full details of these docks can be found at Castle Volkihar. It's possible to swim around the entire island, however most of the castle is surrounded by large rocks, apart from two beaches; one between the jetty and docks and another on the northeastern side of the island, where a couple of tufts of spiky grass can be found growing.
From the jetty a path leads up and across a bridge with six statues of gargoyles spaced along it on both sides. As you cross the bridge the first time Serana will stop you and initiate a short conversation regarding the inhabitants. As you near the portcullis the watchman will raise it and comment:
|
"After all these years, Lady Serana's back!" |
If you are a member of the Dawnguard, when you return to Isran with Auriel's bow, he will lead the other members to the island, agreeing to meet you there. On arrival you'll meet the Dawnguard by the jetty. The party includes Isran, Celann, Durak, Florentius Baenius, Gunmar, Sorine Jurard, and an armored frost troll. They will follow you across the bridge towards the entrance. As you near the first pair of gargoyles, up to three of the gargoyles on the bridge will burst to life and attack. During the fight Modhna, Namasur, Stalf, Rargal Thrallmaster and the death hound Garmr will join the battle. Once they are all dealt with the members of the Dawnguard will charge cross the bridge and enter the keep.
Outside you will see that the gargoyle statues have been replaced, however now none of them will burst to life. The armored frost troll is left by the jetty on the island.
Volkihar Keep[edit]
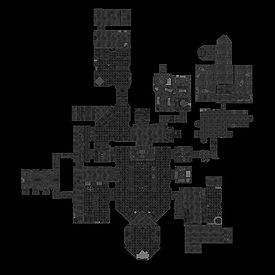
Doors[edit]A: Boat transport to Icewater Jetty Rooms[edit] |
Main Hall[edit]
When first entering through the large double doors, you will find yourself in an antechamber, with Vingalmo standing opposite you. He will initially be cross commenting "How dare you trespass here! wait... Serana?, is that truly you? I can not believe my eyes." He will then lead you through an arch behind him, into the main hall where most of the castle's inhabitants have gathered and are feeding or wandering the hall. There are gargoyle statues on raised section on either side of the antechamber and wooden benches flanking to large entrance doors. When storming the castle with the Dawnguard, you'll be met in the main hall by Fura Bloodmouth, Orthjolf, Salonia Caelia and the death hound CuSith, while Garan Marethi and Vingalmo are attacking from the balcony over the lab and Feran Sadri is firing fireballs repeatedly from the balcony to the north of the main hall.
| Present: |
† Will be observing from the balcony to the west.
If you chose not to accept his blood and become a vampire lord, then only the Main Hall and Chalice Rooms are all you can access of the interior of the castle before he banishes you, sparing your life as reward for returning the Elder Scroll and his daughter to him. Everything in the rooms and alcove can be freely taken prior to first speaking to Lord Harkon, regardless of whether you ultimately accept his gift or are banished from the castle. Again after returning to complete The Bloodstone Chalice quest, most items within the keep will be freely taken. All the doors leading from the hall are locked and require a key to open them.
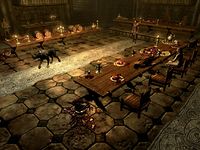
There are two flights of stairs leading down into the hall from the south, with a large planter beneath the stairs containing two nightshade plants. The hall is laid out with two long rows of tables arranged parallel to the side walls and a long head table across the far end of the room. Behind the head table, against the north wall is a throne with a small table to the right holding a silver goblet and narrow tables on either side of the throne. On the tables there are a total of three potions of blood, two vampire cattle ready for feeding on by the vampires, sixteen silver goblets, three silver jugs, nine plates and four platters holding seven pieces of human flesh, with three bowls on the floor beside the tables. There are gory bones and skulls on the tables and in the bowls on the floor. There are two additional vampire cattle serving as waiters holding platters with goblets on them, one on either side of the room. Against the western wall is another long table laid with a platter holding two more pieces of human flesh, a silver jug and six silver goblets.
There is a small alcove in the northeast corner of the hall, with a door facing west and a long table on either side holding several small barrels that appear to contain blood and two empty platters. In addition to the door in the northeastern corner, there is another door to the right of the Chalice room and another opposite, with a much larger set of double doors further to the left also on the west wall. In the northwestern corner there are stairs leading up to two openings with portcullises blocking access; one facing west, the other north, between them is a planter containing a deathbell plant. There is a balcony above the throne on the north wall and another on the west wall.
Chalice Room[edit]
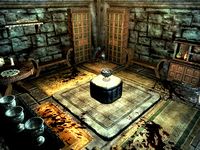
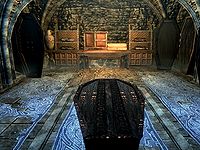
The Chalice room is more like an alcove as the arch into it takes up most of the wall between the hall and chalice room, in the middle of the east wall of the hall. It is where you will find the Bloodstone Chalice on a low wide plinth in the middle of the room. Around the walls are several wooden benches, two wall shelves holding a copy of Thief of Virtue and three goblets, a chair with a small table beside it, holding a silver goblet and iron dagger, with a pair of vampire boots on the floor beside the table. There are also two bookcases with doors on (similar to those found in the Arcaneum) containing copies of many common books and a few rarer ones; Ghost in the Storm, Wraith's Wedding Dowry, The Apprentice's Assistant, and There Be Dragons. There is a lute in the corner between the bookcases and a small wardrobe against the south wall, containing a selection of fine clothes and boots. There is a small unit above the wardrobe holding a bottle of spiced wine, a bottle of Nord mead, a bowl of moon sugar, two bottles of skooma and an empty skooma bottle.
Upon returning from Redwater Den with the filled Bloodstone Chalice it is returned to the Chalice room. Thereafter, if you drink from the chalice while a vampire, it will improve the power of your Drain Life spell to also absorb magicka and stamina for the duration of the effect. The amount of time the effect lasts increases each time you add any one of five ancient vampire body parts.
Coffin Room[edit]
The stairs lead around a corner before entering the sleeping quarters for most of the less important of the vampires and those who work in the apothecary section of the lab. It contains six upright coffins that are marked as owned against two of the walls and two coffins laying flat on the floor down the middle that are free to use. There is a wash basin on the left at the bottom of the stairs, two rows of three weapon racks on the east wall holding an iron and steel battleaxe, and against the west wall is a wooden table with an empty set of shelves and an adept locked display case on top, a small wardrobe on either side containing a selection of fine clothes and boots. Above these are shelves with a total of four vampire cuirasses on top. On the floor are two pairs of Vampire Boots. In the display case is a gold necklace, a silver emerald necklace and a bone hawk amulet. To the south another passage leads around the corner and enters the ground floor of the lab. During the battle for the castle with the Dawnguard, Ronthil can be found in the coffin room, he doesn't seem to join the main battle in the main hall, but will attack as soon as you enter the coffin room.
Lord Harkon's Quarters[edit]
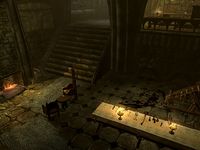
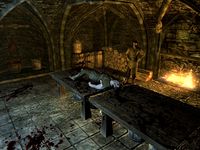
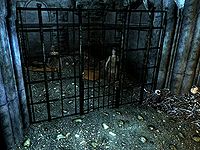
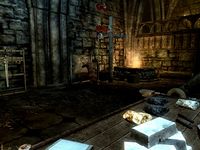
These quarters are built on two levels, you enter on the lower level, which contains an unlocked large square cage in the southwest corner. On the west wall is a fireplace with amany books, including Final Lesson, Physicalities of Werewolves, The Book of the Dragonborn, and Varieties of Daedra. Between the books cases is an unlocked display case containing a unique werewolf pelt. High above the bookcases and cabinet are two large planters containing two deathbell plants and two nightshade plants. To the left of the bookcases is a torture rack and long wooden table coming out from the wall. On the table is an iron dagger, a potion of minor healing, two weak recovery poisons, a weak magicka poison, a woodcutter's axe, some leather strips and other items, all of which appear to have been used to torture some unfortunate. Around the rack blood has been splashed up the wall and across the floor. To the left are two narrow tables, one of which holds a couple of small mead barrels. Strangely, there is Mythic Dawn banner hanging above the torture rack.
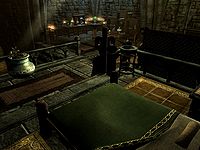
To the right of the fireplace a flight of wide stairs lead up to a balcony, with four locked display cases on two narrow tables against the west wall. Two are apprentice locked, one is adept and the forth expert locked. They contain; a bone hawk amulet, a Bone Hawk ring, a diamond, a necklace of minor magicka, a scroll of hysteria, and four human hearts. There is a long wooden table and chair along the front edge of this balcony, with a long unlocked chest underneath and a small unit on top holding only multiple inkwells. Against the east wall is a raised, unlocked display case holding a dragon priest dagger, with covered bookcases on either side. They hold many books, including copies of; On Oblivion, On the Great Collapse, Chaurus Pie:A Recipe, and The Dragon War. There is a wooden door on the north wall that opens into his sleeping quarters. To the right of this is another table. On the table is a potion of blood, a scroll of fury and a small empty unit. There are also two wall shelves above the table holding a filled and an empty common soul gems in holders (see bugs) and a total of thirteen more books including copies of; 2920 First Seed, v3, Dwarves, v1 and v3, Feyfolken II, Dragon Language:Myth no More, The Wild Elves, The Madness of Pelageus, and The Ababal-a.
Through the door to his sleeping quarters, the room has a raised section at the far end, where Lord Harkon's coffin is found upright against the east wall. To the left are two tall wardrobes, while to the right is a narrow table holding a cheap goblet and plate holding with a diamond, a sapphire, a garnet and seven loose septims. On the lower level of this room, against the north wall are two small wardrobes containing a selection of fine clothes and a pair of weapon racks holding a random warhammer. On the south wall is an empty wall shelf.
On your left when leaving Lord Harkon's quarters or when leaving the cathedral, the passage to the east in front of you has a wide flight of stairs on the left, leading down opposite the balcony overlooking the main hall to the north. The stairs are blocked by a cave-in, but originally lead to the courtyard, They can be cleared and repaired after completing Dawnguard's main questline on the Volkihar side by talking to Garan Marethi. This repair is free of charge and is completed the next time you enter the keep. There is another blocked flight of stairs at the end of the passage. To the left of this is a passage with stairs leading up to a door into Serana's room.
Serana's Room[edit]
This room was originally owned by Serana, although even after it's refurbished no one seems to enter it at any point, including Serana herself. When you first return Serana to the the castle, her room has a small lower area by the door, with two empty planters on the right. Stairs lead up to the main part of the room which contains a few odd pieces of furniture, two small wardrobes containing fine clothes and boots, four empty wall shelves and many, many crates in several stacks around the room, including a very large stack against the north wall. From the amount of dust, dirt and cobwebs in the room it doesn't appear that anyone has been in here for a very long time. Serana herself doesn't seem to return to the room except if accompanying you.
Anytime you return to the castle after completing the Prophet quest, you will typically find Dexion Evicus in Serana's room, either working at the alchemy lab or resting. While you are off collecting the other two scrolls during Seeking Disclosure you may find that Lord Harkon decides to shackle him to the wall, however you are able to fre him and he will return to spending most of his time in Serana's room, acting pretty much as he was before.
Upon returning from Redwater Den and completing The Bloodstone Chalice quest, you will find that Serana's room has been completely cleared, cleaned and furnished with quality furniture. Now upon entering the planters on the right have been planted with a canis root, a blue mountain flower, a snowberry bush and thistle. Climbing the stairs there is a sideboard against the south wall on your left, with a built-in alchemy lab and a wall shelf high above. Beside this on the sideboard is a small unit holding a leveled potion of strength, and an empty and a filled random soul gem. To the right, in the southwest corner is an arcane enchanter. Along the west wall are a row of three sets of shelves holding a flute, a garlic bulb, a Dwemer spoon, a knapsack, a horker tusk, copies of The Song of Pelinal, v3, Physicalities of Werewolves and Shezarr and the Divines, a drum, an apothecary's satchel, and a small coin purse. High above the sets of shelves is another wall shelf. In front of the third of the shelves is a round wooden table and two chairs laid with cheap crockery for two. Further along the west wall is a fireplace with a pile of firewood and a woodcutter's axe to the left, while to the right, in the northwest corner is a small wardrobe containing fine clothes and boots, with more cheap crockery on top. On the north wall is a wooden door with a small area behind. In the small area there is a tall wardrobe containing common clothes and two narrow tables with display cases on top. One is expert locked and holds a random enchanted dagger and gold ring, the other is adept locked and holds a gold jeweled necklace and a silver emerald necklace. In the main part of Serana's room, in front and to the right of the door is a low table and wooden bench with small tables at either end and a screen behind. This screens off the area around the bed. Behind the screen is a raised section with a couple of steps up to it. On the platform is a large double bed with a small wardrobe on either side and another to the right of the steps up to the platform. They all contain a selection of fine clothes and boots. On top of the wardrobe to the left of the bed is a bowl containing an emerald, a garnet and twelve loose septims. There is a wash basin on either side at the front of the platform and two long wall shelves on the east wall, however these as well as the first two shelves hold nothing of interest. Finally there is a planter containing a dragon's tongue plant, opposite the foot of the bed.
The Lab[edit]
Feran Sadri and Ronthil can both be usually found here working on the ground floor, and Garan Marethi can be found on the balcony. Lord Harkon frequents the ground floor as well. Through the arch to the south is the balcony level of a lab. It runs the length of the room to the south and east. Along the north wall are is a corner shelving unit next to a covered bookcase holding many common books, plus copies of Shezarr and the Divines, and Songs of Skyrim. Further along is an owned upright coffin, which Garan Marethi frequently uses, with a small wardrobe containing fine clothes and boots beside it. Further to the right of this is a sideboard with a pair of vampire gauntlets, a vampire cuirass and a small set of shelves holding six books including a copy of Ghosts in the Storm. At the end is the other balcony overlooking the main hall, where two chairs and small tables can be found. On the tables are copies of The Aethurium Wars and The Arcturian Heresy and a silver goblet.
Along the west wall are four more covered bookcases containing many more mostly common books, plus copies of Argonian Account, Book 4 (two copies), Feyfolken III, On Oblivion, Physicalities of Werewolves, Dragon Language:Myth No More, Magic From the Sky, and Palla, Volume 2. There is a chair betweem the first two bookcases and a small cupboard containing clutter, with a small set of shelves on top. These shelves hold eight more books, including copies of The Seed, Herbane's Bestiary:Automations, Glories and laments (two copies), Dwarves, v1, Ghosts in the Storm, and also a copy of An Explorer's Guide to Skyrim which will add several map markers to your map if you haven't already discovered the locations.
Further along the wall is an empty sideboard beside an apprentice locked display case containing two filled petty soul gems, a filled lesser soul gem, a filled common soul gem, an empty greater soul gem and an elven dagger of binding. To the left of the display cabinet, in the southwestern corner is an arcane enchanter and to the left against the south wall is a small master locked display case containing an empty black soul gem, on top of a small unit. Beside this is a flight of stairs leading down to the lower floor of the lab.
At the bottom of the stairs , against the south wall is an adept locked display cabinet containing two bottles of frostbite venom, a weak frenzy poison, two bottles of weak paralysis poison, a malign lingering poison and a frenzy poison recipe: to combine a sample of blisterwort with a Falmer ear. To the left of the cabinet is another covered bookcase holding many common books, plus copies of 2920, Evening Star, v12 and Feyfolken I. In the southeastern corner is an empty corner shelf unit with two sets of shelves in front, one is against the east wall, while the other is angled away from the wall. The shelves hold a total of forty-five books including copies of The Falmer: A Study, Argonian Account, Book 4, Treatise on Ayleidic Cities, Brothers of Darkness, On Oblivion, The True Nature of Orcs, Palla, volume 2, Words of a Clan Mother Ahnissi, The Lusty Argonian Maid, v2, 16 Accords of Madness, v.XII, Mystery of Talara, v5, Death of a Wanderer (two copies), Sovngarde: A Reexamination, The Dowry, The Apprentice's Assistant, The Night Mother's Truth, and Imperial Report on Saarthal. In addition to these rarer volumes there are also copies of Lost Legend and The Legend of Red Eagle, both of which will initiate quests unless already received and another copy of A Explorer's Guide to Skyrim, which will add several markers to your map if you haven't already discovered the locations or read a copy of this book previously. Ronthil can sometimes be found sleeping behind the set of shelves that is angled away from the wall, despite there being no bedroll or coffin to use.
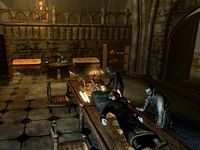
There are a pair of large doors open and leading into the main hall on the east wall, while against the north wall is a set of shelves holding a bowl of bone meal, a sample of blisterwort fungus, a skeever tail, a sample of bear claws, a set of small antlers and two Falmer ears. To the left is an adept locked display cabinet containing a nirnroot, a sample of wisp wrappings, a giant toe, a bowl of fire salts, a piece of canis root, and a swamp fungal pod. There is an alchemy lab to the left and another display cabinet on the other side of the alchemy lab, which is expert locked. It contains a ring of remedy, a hagraven claw, a daedra heart, an eye of sabre cat and a rack of dog meat. Against the west wall is a covered bookcase containing more common books, plus copies of Great Harbingers and The Tale of Dro'Zira. To the left is the short passage leading to/from the coffin room found previously. There are empty corner shelving units flanking the start of it. To the left is a small empty table, two chairs and another empty corner unit. In the middle of this level are two long wooden tables laid end-to-end. One has a dead alchemist on top, who is carrying a piece of human flesh and a nirnroot in addition to his black mage robes, boots and iron dagger. The other table holds a skeleton you can't loot and several rolls of paper. There is a chair pulled up to both these tables.
Kitchen[edit]
Through the door located in the alcove in the northeastern corner of the main hall is a short passage, which then turns north and descends a flight of stairs before entering the kitchen. There are two long tables in the middle of the room with a dead vampire cattle on top. In the middle of the north wall is a fireplace with a bunch of dried elves ear and a bunch of dried frost mirriam hanging from the ceiling above. To the right is an open door and to the left is a large pile of firewood, with a woodcutter's axe beside it. Against the west wall are three unusable barrels and to the left is an alcove where the remains of a human hang from a set of shackles on the wall over a large metal bucket filled with blood. There is discolored water on the floor of the alcove. Opening the shackles with cause the remains to drop and fall apart. To the left of the alcove is a closed wooden door with a small cupboard behind it containing two small set of shelves holding clutter with a bunch of dried elves ear hanging in front.
There is an alcove to the right of the stairs that lead up to the main hall. It contains an empty wooden table with a wall shelf above and a rack holding a pheasant and several gory human bones hanging from the ceiling along with a garlic braid. On the other side of the stairs is a st of shelves holding some fancy crockery. On the east wall is an alcove containing another table and wall shelf. On the table are several silver goblets, a silver jug and some ragged trousers and footwraps. To the left is a larger area containing three large vats that appear to hold blood, several unusable barrels, three food sacks and a small alcove on the east wall containing an owned upright coffin used by Rargal Thrallmaster. There is blood splashed all over the floor throughout the kitchen and finally the door to the right of the fireplace opens into the Thrall Pen. The left-hand food sack is not safe for storage, but the other two blood-splattered ones are.
Thrall Pen[edit]
Immediately through the door is a balcony extending left and right, with stairs descending to the floor. To the left along the balcony is a tall wardrobe containing a selection of common clothes. Beside this is a set of shelves holding an assortment of hat ranging from fine to a chef hat, clothes from fine to a rare set of tavern clothes and boots including a pair of weightless shoes. To the right is anther wardrobe, set of shelves and dresser with shelves above all of which hold various poor quality clothes and footwraps. Descending the stairs leads down to an area that's filthy, with piles of bones all around two large unlocked cells, the one on the left contains up to four vampire cattle and has four unowned bed rolls in it, while the one on the left has two bed rolls and houses three vampire cattle. These Cattle have no dialogue options, and when selected have the option of feeding on them with no adverse side effects. There is a torture rack and a set of shackles that does seem to work, on the right-hand side beyond the cells. Opposite these is a trapdoor over water with two bowls on the floor in front.
Blacksmithing Room[edit]
Through the door to the right of the chalice room is a passage heading south to another wooden door on the left. It opens into the blacksmithing room, which has several levels with stairs leading down to each of them. Immediately on your left is a balcony where you will often find Fura Bloodmouth practicing her melee fighting skills on three practice dummies that are set up here. On the west wall there is a row of three weapon racks holding a random two-handed weapon. Immediately on your right when entering is a short flight of stairs leading up to another balcony to the south, with a planter on your right containing a deathbell plant. There are two Imperial bows mounted on weapon plaques on the west wall and opposite the balcony has three archer dummies with bales of straw behind them and at this end a narrow table holding a quiver of random arrows has been set up to mark the firing point when practicing archery. To the left of the firing point is a small wooden table holding a potion of minor stamina and another quiver of random arrows. There are a couple of steps up to the south to the highest level with a chair to the left and a sideboard to the right. Against the west wall on the highest level is a tall wardrobe containing fine clothes, while against the south wall is an owned upright coffin used by Fura Bloodmouth. To the left is a small cupboard containing clutter and a few gold septims, with a potion of vigor and three loose septims on top. On the east wall is a small set of shelves holding a medium coin purse, a troll skull and blacksmith apron, which may have fallen to the floor.
In front of you when entering, is a flight of stairs leading down to the lowest level. Here you will normally find Hestla working at the forge or one of the other crafting stations. In the southeast corner is the blacksmith's forge, with a random one-handed weapon and an iron warhammer mounted on weapon plaques on the south wall above the forge. To the left of it, against the east wall is a tanning rack, and further to the left are two rows of three weapon racks holding two random two-handed weapons. Below the balcony to the west is a grindstone, in front of a straw bale. To the right of this is a long wooden table holding a piece of silver ore, a piece of gold ore, two pieces of iron ore, six steel ingots and a copy of The Aertherium Wars. To the right of the table is a stack of crates and unusable barrels with an open crate on top containing four iron ingots.
At the northern end of the room there are steps leading up to Hestla's sleeping area, with a workbench to the right of the steps. On your right at the top of the steps is a small set of shelves holding three common books, a silver goblet, two lockpicks, and a potion of strength. In front of you is a small cupboard containing clutter and a few septims, with a piece of leather and some leather strip on top. To the right, along the north wall is a row of two weapon racks holding a random weapon and beside this is another set of shelves, holding an amethyst and four loose septims among items of clutter, they may be difficult to see if the coffin door is open. On the south wall is an owned, upright coffin used by Hestla. There is a screen between the coffin and the workbench, which effectively separates the sleeping area from the rest of the room. There are four mounted wolves heads high on the wall around Hestla's sleeping area, which may relate to her previous membership with the companions and her obvious disdain for them.
Volkihar Cathedral[edit]
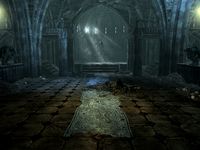
The cathedral is a multi-leveled room attached to the northwest of the keep, which is unused aside from during the related quests. It is filthy with mounds of old bones in the corners, dust, dirt and cobwebs throughout. You will awaken here after accepting his blood and being transformed into a Vampire Lord, at the end of Bloodline. At this time a vampire cattle stands near the door and Lord Harkon will give you basic instructions regarding your powers and weakness, and a brief history of the clan if asked, before instructing to visit Garan for a task he needs you to carry out. In this room you can practice your drain life, vampire servant and bats vampire powers, there are several flights of stairs leading up and at the top two ledges face each other, you can use your bats skill to cross the gap. Once he has finished you are able to explore far more of the castle. All of the doors in the main hall are now unlocked and standing open.
Upon leaving the cathedral there are stairs leading down and at the bottom is a raised portcullis with a chain on your left that operates it. More stairs lead down to a passage with planters on either side holding deathbell plants, with a door on your left leading to Lord Harkan's quarters, a passage in front of you that leads past the balcony that overlooks the main hall above the throne. To the right of this passage are two bookcases with doors on holding mainly common books, but including a few rarer books: Skyrim's Rule, The Falmer:A Study, Fall of the Snow Prince, and The Lusty Argonian Maid, V2. There is another opening to the south of the stairs, which is one of the two openings that had portcullises blocking them in the corner of the main hall and a final passage to the southwest that leads around the corner, passing the other opening that had a portcullis blocking it previously. Directly ahead is an archway through to the library and to the right of this is a short flight of stairs leading down.
When returning with Auriel's bow during the Kindred Judgment quest, all the vampires will immediately comment on the bow and direct you to Lord Harkon, with the exceptions of Modhna and Namasur, who's dialogue options don't seem to change. Lord Harkon can be found within Volkihar Cathedral awaiting both you and Serana to return with Auriel's Bow and the final battle in the main Dawnguard questline. As you approach, you'll find that the portcullis at the bottom of the stairs leading up to the cathedral has been lowered. The chain to raise it is to the right, with another on the other side of it should you wish to lower it behind you, although this is unnecessary. Inside the cathedral there is an unlocked chest on your immediate left when entering, which may already be empty. Lord Harkon is waiting inside, having already transformed ready for battle as a vampire lord. He will initiate a conversation with his daughter and then you, before the battle is joined. These can be skipped by simply attacking him. During the fight he will raise several skeletons, both the weak standard type and the tougher armored type and three gargoyles will burst to life. Once any of the minions are killed both you and Serana are able to raise them, thus reducing the number Lord Harkon can raise again. Once he's been dealt with don't forget to loot his remains to recover his unique sword, a set of vampire royal armor, a ring of eminent destruction, a necklace of magic suppression and various other loot. As soon as the battle is won, Garan Marethi will enter and offer you his congratulations and Serana commiserations.
After the battle has finished between the Dawnguard and vampires, Isran and the armored frost troll will wait by the portcullis that's blocking access to the stairs leading up to the cathedral. Once you and Serana destroy Lord Harkon, Isran will enter and congratulate you both before leaving. When you leave the cathedral you will find that any surviving Dawnguard members have already left. Isran being the last to leave after to speaking to you and Serana.
Notes[edit]
- All "wardrobes" and "bookcases" within the keep are safe for storage. Unless otherwise noted, other containers respawn after ten days along with the rest of the keep.
- With 38 of the 41 containers being safe for storage, all regular crafting amenities except a smelter, and three merchants available within the keep, this location can be ideal for use as a homebase if you side with the Volkihar vampire clan.
- Serana's room will only be furnished after completing The Bloodstone Chalice quest.
- Committing a crime in Volkihar Keep will increase your Whiterun bounty.
- If you lose your vampirism after siding with the Volkihar vampires in the Dawnguard questline, the NPCs in the keep will suggest you have Serana change you back. This must be accomplished before any further quests will be given.
- However, you are not required to become a vampire lord again; being a regular vampire will work. All NPCs will behave the same regardless of your type.
- If you return to the Soul Cairn after completing Kindred Judgment, you can speak with Valerica and inform her of Harkon's death. She will move back into the keep and restore the courtyard.
- If you have joined the Dawnguard, all the bodies of named NPCs (except Lord Harkon) killed during Kindred Judgment will never disappear.
- If you have joined the Volkihar Vampire Clan, then after completing The Bloodstone Chalice quest most items found within the keep are free to take and all the coffins except Lord Harkon's can be freely used. However if you joined the Dawnguard, even after completing Kindred Judgment, all items remain marked as owned and taking them will be considered stealing.
- The inside of the keep will respawn after ten days. This can be specifically beneficial to vampire characters who did not side with the Volkihar, as it allows access to four respawning potions of blood. There is one on each table in the main dining room, and another in Harkon's quarters. However, these potions will have to be stolen in order to be taken.
Bugs[edit]
- The filled common soul gem may be missing from the right-hand holder in Lord Harkon's quarters. ?
