Online:Cloudrest
|
||||
|---|---|---|---|---|
| Trial | ||||
| Discoverable | Yes | |||
| Completion | Objective | |||
| Dungeon | Yes | |||
| # of Zones | 1 | |||
| Zone | ||||
| Summerset | ||||
| Location | ||||
| East of Ebon Stadmont | ||||
| Instanced Dungeon | ||||
| Group Size | 12 | |||
| Bosses | 4 | |||
| Mini-Bosses | 0 | |||
| Veteran Speed Run Target | 15 mins | |||
| Crafting Stations | ||||
|
||||
| Loading Screen | ||||
 The Aerie of the Altmer, the city of Cloudrest clings to the highest slopes of the peak of Eton Nir, tallest mountain on Summerset Isle. Somehow, its thin air is as heady and bracing as chilled nirnroot wine.
|
||||

Cloudrest is a city found on the mountain of Eton Nir in Summerset, east of Ebon Stadmont. It serves as the home base for the Welkynar Gryphon Knights and their Aerie.
Due to an unforeseen catastrophe, the once-thriving city stands cloaked in a toxic, purple mist. To ensure that the corruption does not spread to the rest of the island, the city is under quarantine by the Divine Prosecution, who were forced to evacuate the city and barricade the main gate.
A cart from Alinor can be taken to get there, and a side entrance lies straight to the west: there is a note found next to it.
You will receive a Crest of the Welkynar for completing this trial on hard mode.
Related Quests[edit]
- Cloudrest Objective: Help Olorime take back Cloudrest. / You helped Olorime take back Cloudrest.

 Woe of the Welkynars: Help a Gryphon Knight defeat a powerful Sea Sload sorceress and save Cloudrest.
 Checking on Cloudrest: Check on Vandoril's mother in the city of Cloudrest.
Characters[edit]

|
|
|
Enemies[edit]
Normal Enemies[edit]
- Malicious Sphere
- Shadow of the Fallen (Veteran-only)
- Yaghra Larva
Elite Enemies[edit]
Champion Enemies[edit]
Bosses[edit]
- Shade of Galenwe and Shade of Falarielle, corrupted shadow clones of Galenwe and his gryphon Falarielle (Optional)
- Shade of Relequen and Shade of Belanaril, corrupted shadow clones of Relequen and his gryphon Belanaril (Optional)
- Shade of Siroria and Shade of Silaeda, corrupted shadow clones of Siroria and her gryphon Silaeda (Optional)
- Z'Maja, a sea sload, who summons her shade when near death
Cloudrest +n[edit]
Although Welkynar Olorime recommends a divide-and-conquer approach to the battle, it's possible to face Z'Maja and up to three Welkynar knights at the same time. This makes the boss fight significantly more challenging and is commonly described as "Cloudrest +1", "+2" or "+3" (depending on the number of Welkynar knights you choose to fight alongside Z'Maja). Cloudrest+ is also frequently referred to by the element of the rider(s) in play: +fire for Siroria, +lightning for Relequen, and +ice for Galenwe.
Defeating Z'Maja alongside multiple Welkynar knights rewards players with one or more Welkynar Style Motif Fragment and changes what items drop from the final boss. Ten fragments can be combined with a Welkynar Binding to create a single random Welkynar Style motif chapter. Side bosses on normal and veteran Cloudrest drop nonperfected body pieces.
| Difficulty | Fragments | Loot drops |
|---|---|---|
| normal+0 | 0 | one weapon per player |
| normal+1 | 0 | one weapon and one body piece |
| normal+2 | 0 | one weapon, one body piece, and one blue jewelry piece |
| normal+3 | 1 | one weapon, one body piece, and one purple jewelry piece |
| veteran+0 | 2 | one perfected weapon |
| veteran+1 | 4 | one perfected weapon and one perfected body piece |
| veteran+2 | 6 | one perfected weapon, one perfected body piece, and one purple perfected jewelry piece |
| veteran+3 | 10 | one perfected weapon, one perfected body piece, and one golden perfected jewelry piece |
Trial Mechanics[edit]
Adds[edit]
For the uninitiated, "adds" are "additional" enemies. Adds are weaker than bosses, and typically show up before a boss fight or are summoned by another enemy or a mechanic in the middle of battle.
There are fewer adds in Cloudrest than in other trials. Small clusters of these monsters can be found before each boss and must be killed before the main boss can become targetable. During each boss's portal phase, adds will walk from the edges of the shadow realm to the center portal. They cannot be killed, but they can be crowd controlled or pulled away from the portal using the Dragon Knight ability Unrelenting Grip or the Fighters Guild skill ability Silver Leash. If the enemies reach the center portal, they will appear upstairs and attack the group members who are upstairs. When the adds are upstairs, they can be killed. Preventing any adds from passing over from the shadow realm awards the achievement Yaghra Blockade.
In the add pulls that are present in each boss arena, groups will typically want to defeat the Nocturnal Creepers first while the tanks hold the Yaghra Monstrosities off to the side. Yaghra Monstrosities should be killed next, and the rest of the monsters should be killed as they congregate around the group to beat up on the damage dealers. Below is a detailed explanation of each non-boss enemy, but the long and short of it is that your group should kill Nocturnal Creepers first (because of their snare), Yaghra Monstrosities second (because of their debuff and one-hit kill ability) and everything else last.
- Types of Adds
- Yaghra Larva are small spider-like adds that appear on the rider arena rings and side portals only. They do very little damage and are not very noticeable.
- Yaghra Striders are large, two legged creatures that use an ability that deals moderate damage and applies a bleed. Tanks can taunt these adds to have them attack them and not the dps.
- Yaghra Spewers are lean, two legged creatures that use a ranged ability that deals moderate damage and applies a snare. Tanks can pull these adds into group, or taunt and outrange their attacks to cause them to walk into the group and die to cleave damage.
- Yaghra Monstrosities are the deadliest adds. Unlike the other Yaghra, it cannot be crowd controlled. Monstrosities use three attacks. Lunging Slash is the Monstrosity's basic attack, which deals very high damage on normal, and is one shot to anyone who isn't a tank on veteran difficulty. Corpulence is the Monstrosity's high damage heavy attack which can be dodged or blocked. If Corpulence is dodged by its target, it will deal moderate damage, apply a conal knock down and stun the target. A Monstrosity's special move is called Baneful Barb. After it raises its front claws, the Monstrosity will take its target down to 40% hp (20% on veteran) and apply a unique heal debuff that reduces incoming healing and self healing by 60% (80% on veteran). This debuff will only end if the Monstrosity that applied it dies, or the target of the debuff is healed back to 100% hp. Yaghra Monstrosities will flood out of the center portal if a group fails the portal mechanic on the side bosses. They must be killed or else your group will wipe. On veteran difficulty only, when a portal is successfully completed, a Yaghra Monstrosity will appear in the center of the arena.
- Nocturnal Creepers are big shadowy tendrils coming out of the ground. Creepers will target the farthest person away from it with an attack that burrows under the ground. When the attack hits a target it does moderate damage to them and roots them in place. While trapped in the root, players take significant damage and must dodge roll to break free of it. After a player breaks free, they are silenced and unable to use abilities proportional to the duration of the root. Nocturnal Creepers spawn in the side arenas when a gryphon or rider is killed and the other is alive. Creepers also spawn while fighting Z'Maja at 40% health and below.
Side Boss Encounters[edit]

Each side arena contains a rider and their gryphon. These can be fought in any order or skipped. If a miniboss encounter is skipped, the rider will appear in the main arena with Z'Maja, and their gryphon will occasionally throw out their respective debuff during the fight. On normal, both bosses in an encounter can be held together and burned down, but on veteran the gryphon and rider need to be about twenty meters apart or they glow red and empower one another's abilities.
- Shadow Realm
- Periodically, a portal will spawn in the center of the arena. A player can press a synergy and be sent into Z'Maja's Shadow Realm. In this realm, there are three crystals that damage dealers need to destroy. When a crystal breaks, they reveal a Malevolent Core orb. On veteran difficulty, when a Malevolent Core is revealed, it shoots oblivion damage at players until one player picks it up via a synergy. When one player picks up a Core, it stops shooting damage at their allies but in turn puts a stacking Oblivion Damage dot on the player holding it that doubles in damage for every second held. A Malevolent Core cannot be manually dropped and will kill the player if held for too long. When a Malevolent Core is revealed, Olorime will toss a Spear of Light somewhere in the upstairs arena upstairs. A player upstairs must synergize these spears to send them down to the Shadow Realm below. The player holding the Malevolent Core must run it to where the spear lands below. Once three Malevolent Cores are run to Spears of Light, the portal group is sent back above. If a group fails to do this mechanic, several Yaghra Monstrosities will appear in the center from the portal and attempt to kill everyone. On veteran difficulty, players who go into the portal will glow light purple and are afflicted with Dark Contamination. Dark Contamination will one shot a player if they attempt to go into a portal while the debuff is still active. The debuff lasts approximately two minutes, requiring more than one team for the portal mechanic.
- Gryphons
- The gryphons can only be physically fought while in the side arenas, though their mechanics will persist in the main arena in the + encounters. While they have different patterns and attack orders, each gryphon cycles through the same basic attacks. Every gryphon light attack applies a powerful stacking bleed dot that ignores resistances. Every time the dot is applied it resets and ramps up in damage so it is recommended that tanks dodge every hit they can from the gryphon. The gryphon also does a frontal conal cleave that knocks players down. On veteran, this cone is a oneshot to non-tanks. After a while, the gryphon will take to the air and fly around. The initial takeoff of the gryphons will knock players back if unblocked and stagger them if blocked. Taunting the gryphon while in the air can direct some of it's attacks away from the group. The gryphon will barrel roll across the arena leaving two roes of aoes that stun on contact. The gryphon will also periodically throw a cyclone attack at whoever it's aggroed upon. The gryphon also rarely will do a swirl of wind spiraling out from itself that stuns similar to the first move. If a gryphon is idling and not doing any of the above mechanics and near another player untaunted, it will light attack them from the air and apply a stack of bleed. All wind attacks from the air from the gryphon apply a strong dot called Dark Drain.
While each side boss encounter is relatively the same, each boss also has mechanics unique to them.
Galenwe[edit]

- Ice Spike
- Galenwe will jump to the furthest player away from him and release a circle of ice that deals significant damage. If a player is not blocking this attack, they will be knocked back but if they are blocking they will be staggered. Players can move out of the aoe indicator before Galenwe lands the attack to take no damage.
- Savage Winds
- Galenwe will put his sword in the ground and begin to channel an attack. Small aoe ice spikes that do significant damage will appear under the feet of random players until he stops his attack or is interrupted by a player.
- Ice Cage
- Galenwe drops an ice ring around himself that does a large initial hit and stacking damage if stood in. A player can dodge roll through the ring to get in or out of it, but will still take some damage.
- Frost Aura
- Galenwe will pause and summon an ice aura around him that does light aoe damage to anyone standing in it.
- Aspect of Winter
- At 60% health on veteran difficulty, Galenwe will stop and do an uninterruptible channel. Three random players will be chosen and have growing aoe circles at their feet. Upon the end of the cast, those players and everybody inside the aoe will have a meteor strike them. If this attack is not blocked, it will knock a player down and stun them. It is important to take these meteors away from players if possible, especially other players targeted by meteors. Overlapping meteors will kill any player caught in the overlap. The meteor mechanic intentionally excludes anybody who has taunt on a boss and any player within Z'Maja's Shadow Realm.
- Falarielle (Hoarfrost)
- During the fight, Falarielle will rear into the air and screech. One player will be randomly chosen to obtain Hoarfrost. Hoarfrost will do stacking dot damage to the player holding it and a stacking snare debuff that will eventually make the player unable to move at all. A player can still "move" by dodge rolling in a certain direction, but this is limited to their stamina pool and dodge roll fatigue.
- After a player has held hoarfrost for a while, it will shift into an Overwhelming Hoarfrost. Players will take severe damage from the hoarfrost and be prompted via a synergy to shed the Hoarfrost. If a player does not drop the frost quickly, they will die.
- When Hoarfrost is dropped, it does moderate aoe damage called Surging Hoarfrost to any player nearby. It is recommended players drop Hoarfrost close enough to group to receive healing but far enough away to avoid damaging people with the Surging drop.
- When Hoarfrost is dropped it will appear as a white circle on the ground. It will wander around the room at moderate speed, sending out Hoarfrost Shards at all players. The damage increases over time and based on distance from the frost. The closer you are to the wandering Hoarfrost, the more damage you will take.
- Hoarfrost needs to pass from player to player three times per cast before it vanishes. Hoarfrost can also be destroyed by taking damage from Galenwe's Ice Spike attack while holding the hoarfrost. After hoarfrost is dropped by a player, they are afflicted by Hoarfrost Scar, decreasing their damage done and reducing their movement speed.
- Hoarfrost will not spawn on a player who hold taunt of a boss in the encounter, but they can pick up the Hoarfrost after another player drops it.
Siroria[edit]

- Scalding Sunder
- Siroria's heavy attack, like the other riders, is a oneshot if not blocked by the tank and must be dodge rolled by the non-tanks if targeted.
- Fiery Breath
- Mimics the Dragon Knight Engulfing Flames ability. This attack is a conal ability that severely debuffs any player hit to take increased damage from other flame damage.
- Dark Talons
- Siroria casts Dark Talons and roots any player within range of her and applies a dot. This ability can be purged away by player abilities that purge debuffs.
- Dragonknight Standard
- Siroria casts Dragonknight Standard and a large aoe that looks like a player standard will appear and do severe damage to anyone standing in the radius. While standing in the aoe of her Standard, Siroria's other abilities are empowered significantly to the point they can even oneshot tanks.
- Fulminate and Burgeoning Blaze
- Starting at 60% health on veteran difficulty, Siroria will leap into the air and land at the spot where the farthest player away was standing when she cast the ability. Upon landing she does a high damage shockwave that sends four roving fire tornadoes out from the center point. The tornadoes spin out in random directions and cause high damage to any target hit before vanishing.
- Silaeda (Roaring Flare)
- During the fight, Silaeda will rear into the air and screech. One player will be randomly chosen to have a flaming aoe bomb centered around them. The aoe will follow them wherever they move. After five seconds, Roaring Flare will explode and do high damage if split with allies or kill a player if they are alone.
- In normal, at least two players can share Roaring Flare's damage and survive. On veteran difficulty, at least three players must share Roaring Flare or the players will die.
- For the purpose of this mechanic, Shadows of the Fallen are considered "players" and it is possible for a player to survive a flare alone with two Shadows of the Fallen and survive. Roaring Flare will instantly kill Shadows of the Fallen in the center arena and award Flares and Deadly Shadows.
Relequen[edit]

- Flux Burst and Static Diffusion
- Relequen will jump to the furthest player away. Unlike the other two riders, this happens instantly. He will leave behind a large shock aoe that does moderate damage. If a player is too far away, this ability can be outranged and Relequen will jump to the second furthest player in radius.
- Shocking Smash
- Relequen will spin his staff and then slam it onto his target, or if dodged onto the ground. This impact will cause several small lightning aoes to fan out in a starburst from the impact point. Players hit by these aoes will take moderate damage and be stunned.
- Direct Current
- Relequen will channel and several lightning bolts will form a line to random players. After a brief duration, these lightning bolts will stun and do severe aoe damage to the players targeted. If the aoes around players overlap, they may be oneshot.
- Shockwave
- A long conal attack will extend out from Relequen and knock back any player who is not blocking. If a player is blocking, they will be staggered.
- Mage's Wrath
- If a player is low on health, Relequen may target them with the Sorcerer execute Mage's Wrath. There is a five second grace period to heal the target to full, otherwise it will deal the full execute damage to a target, even if healed above the normal threshold for an execute mechanic.
- Belanaril (Voltaic Overload)
- During the fight, Belanaril will rear into the air and screech. Two players' bodies will randomly start to spark with lightning and warn them that they are chosen. This gives players three seconds to determine which bar they are going to disable.
- After three seconds, the chosen player's body will glow as a bright blue beacon and do severe damage to themselves and all allies nearby. The damage starts at 1x damage and grows with every tick of the duration up to 40x on the final tick. On veteran difficulty, the final ticks of Overload are a oneshot.
- Players prevent themselves and their allies from taking damage by swapping to the action bar which isn't cursed and remaining on that bar for ten seconds. This debuff frequently bugs and can last for up to twelve seconds at times.
- If a player dies while afflicted with Overload, it will instantly hop to another player without a countdown or warning. This specific Overload will only last for the remainder of the curse, but there will be no visual tells for when said player is uncursed. The damage for Overload does not reset when hopping from player to player and continues to ramp up every second. Voltaic Overloads caused by death can hop to players in Z'Maja's Shadow Realm.
- Werewolves and players under level 15 that do not have access to a second action bar cannot get Voltaic Overload mechanic.
Main Boss Encounter[edit]
Z'Maja is the final boss of Cloudrest. She can be fought after all the Riders and their Gryphons are killed or players can immediately go to the center arena to fight them all at once.
Z'Maja[edit]

- Mind Blast
- Z'Maja's light attacks is a frontal cleave that hits everyone in her sight. Mind Blast causes a small aoe to appear at a player's feet called Cognitive Comber that applies splash damage to targets standing nearby.
- Nocturnal's Favor
- Z'Maja will channel a glowing purple ball and shoot it at her target. This is her heavy attack. It can be blocked but it cannot be dodged. Players can mitigate it's damage using abilities that reduce the damage of projectiles or that reduce incoming damage taken.
- Leeching Shadow
- This is an unpurgeable damage-over-time ability that is applied to players who are hit by her Mind Blast.
- Dark Orbs
- Throughout the fight Z'Maja will randomly summon three floating purple orbs. These orbs can spawn anywhere in the large arena. Players must dps these orbs down quickly.
- On normal and veteran +1 and above when Dark Orbs are destroyed, they shoot three random projectiles at random players. This projectile does significant damage on initial hit called Malicious Strike followed by a severe dot bleed and is also called Dark Drain. Multiple projectiles from one orb can hit the same target. The projectile can be dodged to avoid the dot and damage. The projectile's initial hit can be blocked to significantly mitigate the damage, but it will still apply the dot to the target.
- Orbs can naturally collide with each other or players. When an Orb collides with a target, they send out Sinister Beads in a starburst pattern for the entirety of the large arena. Sinister Beads do significant damage and stun players. Beads can be sidestepped by players but cannot be blocked or dodged.
- If Orbs are left alive for too long, they will pick a random target and charge at their location at rapid speed, casting out Sinister Beads and Malicious Strike at the same time. This attack cannot be blocked but it can be dodged or moved away from as it targets the location the player was at similar to Galenwe and Siroria's jumps.
- Crushing Darkness
- Below 80% hp, Z'Maja will periodically spawn two aoe beams that follow the player who has aggro on her and the furthest person away from her at the time of the mechanic's start. If it touches any player it will do significant damage. Crushing Darkness can be dodge rolled through to avoid taking damage. Crushing Darkness will despawn if the target dies or or enters the Shadow Realm.
- Other Abilities
- Z'Maja will begin to channel a spell for an extended period of time. This channeled attack will teleport three random players into the air and drop them from very high up. If a player is chosen for this mechanic and has taken any other incoming damage, they will die. This channel can be interrupted.
- Z'Maja will wave her hand and a pool surrounded by rocks will appear at her feet. She will hop into the portal and reappear at a random place on the edge of the arena. She does this often throughout the fight and will force players to chase her.
- At 40% health, Z'Maja will begin to summon both Orbs and Nocturnal Creepers randomly around the room.
Shadows of the Fallen[edit]

-
- On veteran difficulty when a player dies, a shadow copy of the player will appear. The Shadow of the Fallen will teleport around the room at random, attacking random players.
- A Shadow of the Fallen will look vaguely like the player it came from. For most races, a player can guess a shade's owner by its height. Beastfolk are notable to find because their Shadows have a tail.
- Shadows of the Fallen can be crowd controlled and pulled into group (or a Roaring Flare) by a player.
- Until a player's Shadow of the Fallen is killed, their body will glow with a purple aura. If another player attempts to resurrect a player who's shadow is still alive, they will take rapid and severe damage called Grievous Retaliation. Grievous Retaliation can kill a healer or dps within 2-3 ticks.
- While a player is dead and their Shadow alive, the top debuff on their character sheet under active effects will be a debuff called "Shadow of the Fallen." This debuff vanishes the moment the Shade is killed.
Shadow Realm[edit]

- Z'Maja spawns a portal to the Shadow Realm similar to the side bosses. In the center arena, there are now multiple Tenebrous Vessel crystals to break. Three of these crystals contain a Malevolent Core and the rest are empty. For every rider fighting alongside Z'Maja, an additional crystal will appear in portal. When the associated miniboss dies, the additional crystal in portal associated with them ceases to appear. On veteran difficulty, when a Malevolent Core is revealed, it shoots oblivion damage at players until one player picks it up via a synergy. When one player picks up a Core, it stops shooting damage at their allies but in turn puts a stacking Oblivion Damage dot on the player holding it that doubles in damage for every second held. A Malevolent Core cannot be manually dropped and will kill the player if held for too long. When a Malevolent Core is revealed, Olorime will toss a Spear of Light somewhere in the upstairs arena upstairs. A player upstairs must synergize these spears to send them down to the Shadow Realm below. The player holding the Malevolent Core must run it to where the spear lands below. Once three Malevolent Cores are run to Spears of Light, the portal group is sent back above. On veteran difficulty, if a portal successfully clears, a Yaghra Monstrosity will appear above. On both difficulties, if players fail to do the portal mechanic, Z'Maja's Shade will appear in the center of the arena upstairs and stun all players while she channels a roomwipe mechanic.
- Additionally to the mechanics shared with the side bosses, the portal contains a Shadow of Z'Maja, which will start at North (entrance). Shadow of Z'Maja will cast Nocturnal's Favor and Mind Blast as above, but the shadow Mind Blast does not cleave anyone but the player with aggro of the Shadow. Z'Maja's attacks in portal still apply dark drain. Z'Maja's Shadow will also attempt to channel and throw people into the air and teleport around the Shadow Realm's arena. After a short duration, Z'Maja's Shade will plant and begin to channel as an aoe slowly fills up from the center portal location. In each corner of the arena, there will be a glowing circle named Winds of the Welkynar that players must synergize with to be tossed up onto a ledge. If a player fails to reach the ledge, they take 80% of their health in oblivion damage or on veteran difficulty are oneshot. There is one less Wind of the Welkynar synergy for every miniboss added to the Z'Maja fight and unlike crystals these do not reappear after their associated miniboss has been killed. The location for Winds of the Welkynar when less than four are present are always randomized. After the first channel, Z'Maja's Shade will channel another faster oneshot mechanic on the ledge above. Players must jump off the ledge before this channel finishes or die.
- The first Portal spawns approximately fifty seconds into the fight, then additional portals spawn fifty seconds after the last portal closes. If a portal is not cleared within eighty seconds of it spawning, Z'Maja's Shade appears and kills all players. The jump phases in the portal occur twenty-five seconds after the portal opens, and the floor explosion takes eight seconds on the lower floor and two seconds on the upper ledge for thirty-five total seconds. The second jump phase occurs another twenty-five seconds after the ledge explosion. After the second jump phase, Z'Maja's Shade appears and slowly walks towards the portal, taking ten seconds to get to the portal. If allowed to reach the portal, the roomwipe mechanic occurs upstairs. On veteran difficulty, players who enter the portal are afflicted with a debuff called Hollowing Torment which prevents them from going into the portal again for two minutes and forty seconds. If a player with Hollowing Torment active tries to enter the Shadow Realm, they will instead die instantly. Hollowing Torment as a debuff is removed on death.
- Cone
- At 60% health on Z'Maja when a portal is active, a large conal aoe will target one random player and extend from the portal to the wall. After a few seconds, a gust of shadow will shoot out and transport any player who is caught in the aoe into the Shadow Realm. If a player is afflicted by Hollowing Torment and caught in the cone, they will instantly die. When a cone is active upstairs, another will appear below in the portal and attempt to suck players back out of the Shadow Realm. If a player is caught in this cone, they will be sent upstairs and afflicted with Hollowing Torment.
Shadow of Z'Maja[edit]
At 5% hp, Z'Maja will desperately teleport to the back center of the arena and channel a unique portal in the center of the room. At the end of the channel, the Shadow of Z'Maja from the portal will appear above. Her attacks now replicate Z'Maja's and her Mind Blast cleaves. During execute, she will frequently summon Dark Orbs and Nocturnal Creepers. In addition to these, Z'Maja has a few new abilities:
- Baneful Mark
- Z'Maja will target the player who has aggro of her and the five closest players in proximity to her shade with Baneful Mark. This ability takes targeted players down to 40% health on norm (20% on veteran) health and gives them a 40% (80% on veteran) debuff on all healing received. In addition, it also applies a stacking damage dot which increases in damage every 1.5 seconds and doubles the cost of ultimate abilities. These debuffs will not strip from a player until they are healed to full health. This occurs every 20-30 seconds.
- Chaotic Fulisade
- Z'Maja will randomly throw shadowy bombs onto the ground causing moderate aoe damage. This ability can be potentially lethal if paired with any other incoming damage and afflicted with Baneful Mark.
+Miniboss[edit]
- Any rider not killed before engaging Z'Maja will appear in the center arena fight. They will bring all of their mechanics described above into the center arena while dealing with Z'Maja. While the Gryphons are not present physically, they will still throw out their corresponding mechanic throughout the entire fight. Roaring Flare, Hoarfrost, and Voltaic Overload cannot naturally spawn in the portal, but it can be brought there by synergizing with the portal shortly after being chosen by the mechanic. Minibosses will always spawn in the same order and exclude any rider killed and in the same location. If a rider is not killed by the time another rider spawns, it will heal to full and enrage. In execute, Gryphon mechanics double (two Roaring Flares, two Hoarfrosts, four Voltaic Overloads).
| Rider | Spawn Location Relative to North/Entrance |
|---|---|
| Siroria | West |
| Relequen | South |
| Galenwe | North |
| Difficulty | Spawn | |||||
|---|---|---|---|---|---|---|
| +3 | 75% Siroria | 50% Relequen | 25% Galenwe | |||
| +2 | 66% First Rider | 33% Second Rider | ||||
| +1 | 50% Rider | |||||
Layout[edit]
The starting area of Cloudrest is a small market that hosts all available crafting stations. Lembien the merchant and Wailimo the mystic can be found here too, alongside several injured or fleeing citizens. Wailimo's Personal Account can be found near the mystic. Welkynar Olorime waits by the market with her gryphon, Darremalatu, seeking aid to stop Z'Maja and save Cloudrest.
Heading north, you pass through a large gate and onto a vast bridge that leads to the main boss. The domed citadel in the center serves as the main boss arena, occupied by Z'Maja. Surrounding the main arena are three circular ramparts where each of the Welknar knights can be fought. Littering the ramparts are signs of a battle as displayed by abandoned siege weapons and fortifications.
Books[edit]
- Cloudrest Secret Entrance by D (outside)
- The Gryphons of the Welkynars by Welkynar Siroria — Advice for prospective Welkynar knights on capturing and training a gryphon mount
- Observation Note 154: Z'Maja's Capture by Welkynar Galenwe — A Welkynar's concerns about a captured Sea Sload
- Wailimo's Personal Account by Wailimo the Mystic — A citizen's account of the terrifying Sea Sload takeover of Cloudrest
- The Welkynars of Eton Nir by Sir Relequen, Wing Captain of the Welkynars — A treatise on the famed gryphon knights of Cloudrest
Sets[edit]
| Set Name | Bonuses | Armor Weight |
|---|---|---|
| Aegis of Galenwe |
2 items: Adds 28-1206 Maximum Health |
Heavy Armor |
| Perfect Aegis of Galenwe |
2 items: Adds 28-1206 Maximum Health |
Heavy Armor |
| Arms of Relequen |
2 items: Adds 15-657 Critical Chance |
Medium Armor |
| Perfect Arms of Relequen |
2 items: Adds 15-657 Critical Chance |
Medium Armor |
| Mantle of Siroria |
2 items: Adds 3-129 Weapon and Spell Damage |
Light Armor |
| Perfect Mantle of Siroria |
2 items: Adds 3-129 Weapon and Spell Damage |
Light Armor |
| Vestment of Olorime |
2 items: Adds 3-129 Magicka Recovery |
Light Armor |
| Perfect Vestment of Olorime |
2 items: Adds 3-129 Magicka Recovery |
Light Armor |
Notes[edit]
Achievements[edit]
There are 19 achievements associated with this trial:
| Achievement | Points | Description | Reward | |
|---|---|---|---|---|
| Welkynar Style Master | 50 | Learn every chapter in the Welkynar style book, occasionally found as rewards for completing the Cloudrest Trial. | ||
| Needed for Cloudrest Savior | ||||
| Cloudrest Savior | 50 | Complete the listed achievements for Cloudrest. | Title: Welkynar Liberator | |
| Cloudrest Completed | 15 | Defeat Z'Maja, Siroria, Relequen, and Galenwe in Cloudrest. | Title: Cloudrest Hero Trophy: Z'Maja (page) Cloudrest Banner, Hanging (page) 10,000 |
|
| Cloudrest Conqueror | 50 | Defeat Z'Maja, Siroria, Relequen, and Galenwe in Veteran Cloudrest. | Title: Shadow Breaker Bust: Z'Maja (page) |
|
| Cloudrest Vanquisher | 50 | Defeat Z'Maja, Siroria, Relequen, and Galenwe in the same fight in Veteran Cloudrest. | Title: Bringer of Light Skin: Z'Maja's Shadow Skin |
|
| Speedy Sload Slayer | 50 | Defeat Z'Maja, Siroria, Relequen, and Galenwe within a time limit of 15 minutes in Veteran Cloudrest. Timer starts when players enter the Cloudrest Aerie. | ||
| Surviving the Shadows | 50 | Defeat Z'Maja, Siroria, Relequen, and Galenwe without suffering a group member death in Veteran Cloudrest. | ||
| One Core, No More | 50 | Defeat Z'Maja with each group member picking up and destroying only one Malevolent Core in Veteran Cloudrest. | ||
| Misery Loves Company | 50 | While battling Z'Maja with all three of the Welkynars' shades by her side, a player with the Hoarfrost affliction and two other players with the Voltaic Overload affliction share the damage of the Roaring Flare eruption in Veteran Cloudrest. | ||
| Flares and Deadly Shadows | 15 | While battling Z'Maja with Siroria's shade by her side, utilize a Roaring Flare attack and achieve 20 killing blows against Shadows of the Fallen in Veteran Cloudrest. | ||
| Core Coordination | 15 | While battling Z'Maja, after activating a single Welkynar's Light, activate two more Welkynar's Lights and destroy three Malevolent Cores within the next 6 seconds in Veteran Cloudrest. | ||
| Yaghra Blockade | 15 | While battling Z'Maja during a single Shadow World event, prevent all yaghra from entering the gateway and crossing into the mortal realm on 15 separate occasions in Cloudrest. | ||
| Normal | ||||
| Cloudrest Contender | 50 | Defeat Z'Maja, Siroria, Relequen, and Galenwe in the same fight in Cloudrest. | ||
| Valorous Combustion | 10 | While battling Siroria's shade by itself, every Roaring Flare throughout the entire encounter must be split between at least 6 players in Cloudrest. | ||
| Shocking Instinct | 10 | While battling Relequen's shade by itself, no player is hit by Voltaic Overload and no player spreads Voltaic Current to other players throughout the entire encounter in Cloudrest. | ||
| The Mystic's Ice | 15 | Have Galenwe's shade destroy 20 roaming Hoarfrost cyclones with his Spiked Ice attack in Cloudrest. | ||
| Veteran | ||||
| A Sload and Her Shadow | 50 | Defeat Z'Maja with one Welkynar shade fighting by her side in Veteran Cloudrest. | ||
| Three's Deadly Company | 50 | Defeat Z'Maja with two Welkynar shades fighting by her side in Veteran Cloudrest. | ||
| The Path to Alaxon | 50 | Defeat Z'Maja, Siroria, Relequen, and Galenwe in the same battle without suffering a group member death within 15 minutes of entering the Cloudrest Aerie in Veteran Cloudrest. | Title: Gryphon Heart | |
Maps[edit]

Gallery[edit]
-

Entrance to Cloudrest
-

The main bridge to the arena
-
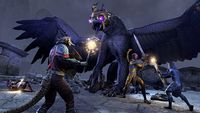
Facing off against a gryphon
.jpg)


