Shivering:Xaselm
| This place page is currently being rechecked as part of the Oblivion Remastered Project. The page is being checked in several stages to verify any changes due to the release of Oblivion Remastered. All users are welcome to make changes to the page. If you make a change that is relevant to the project, please update this template accordingly, and make sure you have observed the project guidelines. Details Walkthrough: not written Interior Remastered Images: not added |
|
|||
|---|---|---|---|
| # of Zones | 4 | ||
| Occupants | |||
| Relmyna Verenim Nanette Don Undead Shambles Failed Experiments Victims (1 boss-level Flesh Atronach) |
|||
| Important Treasure | |||
| 2 boss-level Urns 1 Hollowed Amber Limb 1 Madness Ore Deposit |
|||
| Console Location Code(s) | |||
| XPXaselmExterior, XPXaselm01, XPXaselm02, XPXaselm03, XPXaselm04 | |||
| Region | |||
| Dementia | |||
| Location | |||
| Northeast of The Fringe, west of The Hill of Suicides | |||
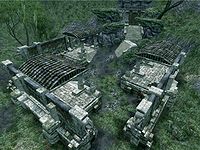
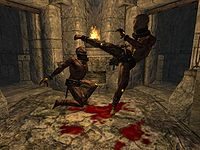
Xaselm is a large ruin east of the Gates of Madness that is the sanctum of Relmyna Verenim, containing monsters (quest-related). It contains four zones: Xaselm, Xaselm, Experiment Chambers, Xaselm, Corpse Pit, and Xaselm, Sanctum of Vivisection.
Related Quests[edit]
- Rebuilding the Gatekeeper: Find all of the parts of the Gatekeeper and rebuild it.
Notes[edit]
- Before the related quest, you will only be able to proceed until door O in the Experiment Chambers.
- There is an initially locked back entrance into Xaselm, which bypasses all the earlier zones. You will be given the key during the quest, after traveling through the ruin once.
- Xaselm contains several of Relmyna Verenim's experiments and you are free to participate. See this section for details.
- One test zone related to this ruin didn't make it to the game. XPXaselm05 is the console code for an Ayleid Ruin-like area called "Xaselm" that links to nothing else.
- This ruin contains 4 Thorn Hook plants, 16 Root Stalk plants, and 40 Withering Moon plants.
Exterior[edit]
- The exterior is located at coordinates: SEWorld -5, 1
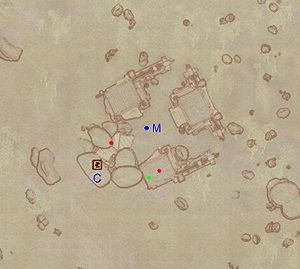
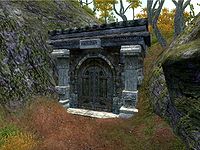
- This location's map marker (M on map) is named Xaselm (editor name XPXaselmMapMarker). The entrance door is SW of the marker, 70 feet away.
- 2 Undead are near the entrance
- 1 Monster (Dementia) is near the entrance
- 1 Chest (Wilderness; non-respawning) is near the entrance
- The following plants can be found near the entrance: 4 Fungus Stalk plants, 1 Letifer Orca Planta plant, and 1 Mushroom Tree Sapling plant
Zone 1: Xaselm[edit]
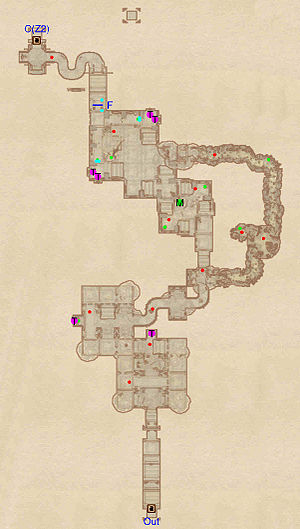
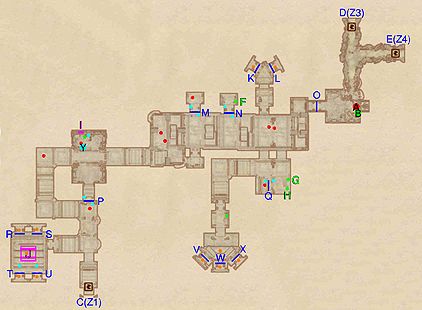
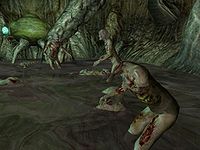
Upon entering from door Out, opening the iron gate reveals a large room with a bridge on the upper level. Dodge the fire coming from the hunger statue trap on the far end of the room (T) and make your way across the bridge. The next room resembles the previous, with another Hunger Statue shooting from the alcove to the west. A minor loot chest sits at the foot of the trap, if you are brave enough. Locate the eastern path and follow it as it twists and turns towards an intersection. Following the root tunnel to the right will net you a few chests, and your first encounter with an enemy unique to this ruin, one of Relmyna's failed experiments, which will rise from the dead when you get near. The path straight ahead offers a few chests and a Madness Ore deposit at M, so if you want everything, backtracking is unavoidable.
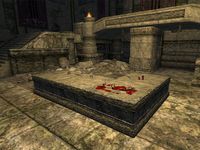
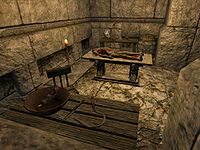
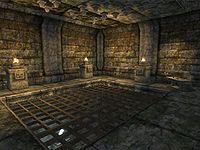
The final room is potentially dangerous as it contains four Hunger Statue traps lined up in the two corners up the stairs (T), and an enemy wandering around near the stone table in the center. The room hints at things to come, as piles of bones and more failed experiments are scattered around, chains hang from the ceiling and the table contains all sorts of torture instruments. Fortunately, there is not much to be found here, as the three urns (green dots on map) contain either potions or minor loot. If you want to explore the room in peace, it is possible to turn off all the traps by activating the four buttons on the ground level (cyan dots on map). Otherwise, make a run for the gate in the northern corner (F), quickly activate the button nearby to open it and proceed to Xaselm, Experiment Chambers through door C.
Occupants:
- 1 Failed Experiment (non-respawning)
- 7 Undead (special list; equal chance Flesh Atronach, Skeleton, or Skinned Hound, all leveled)
- 3 Shambles
- 1 Shambles (always best possible level)
Treasure:
- 1 Madness Ore Deposit (1-4 Madness Ore; non-respawning) at location M on map
- 1 Chest (locked)
- 1 Hollowed Stump (Healing)
- 3 Urns (Healing)
- 3 Urns 02
- The following ingredients will always be found: 3 Mort Fleshes
- The following plants will always be found: 4 Thorn Hook plants, 8 Root Stalk plants, and 17 Withering Moon plants
Traps:
- 6 Hunger Statue traps at locations T on map
Doors and Gates:
- There are two doors in/out of this zone
- 1 door (at Out) leads outside
- 1 door (at C) leads to the zone Xaselm, Experiment Chambers
- 1 Metal Gate (Initially closed bar gate) at F
Zone 2: Xaselm, Experiment Chambers[edit]
From this zone, Xaselm will change drastically, molded by the depraved mind of Relmyna Verenim. As the name suggests, this is her Experimentation Chambers and features several sadistically designed chambers, with piles of test subjects and failed experiments, either dead or dying. Most chambers invite you to participate in the bizarre experiments as well, and the reasonings behind the mayhem can be found and studied in several notes scattered across the zone. Please see this section for details on each experiment.
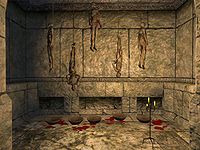
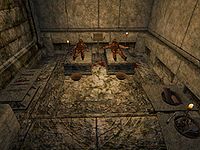
Upon entering from door C, the path to the left leads to the very first experiment while going straight ahead takes you to an intersection guarded by an Undead. Don't miss the emerald lying near the stairs. Unlock gate P to access another experiment (Y), then backtrack and head west. This path lands you on a bridge above the previous room and will take you to a long set of stairs heading down. Opening the gate at M will cause one of the three failed experiments to rise from the dead, while the adjacent room contains five corpses hanging from the ceiling, with their blood dripping into bowls below. Continuing down the stairs leads to another room behind door N, with a headless and mercifully dead experiment lying on a table near F and an urn.
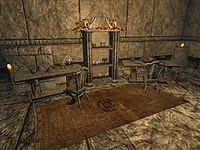
After the final set of stairs, multiple paths are available. The northern path leads to the Week-old blood experiment and a few of Relmyna's notes: one describing the project at hand; while the other, Project Hound's Blood - Day 7, explains the purpose of the headless corpse upstairs. The two southern vaults lead to one of Relmyna's many desks (H), where you will find alchemical apparatus, bonemeal, mort flesh and void essence samples, along with two weak potions of might and three weak potions of healing. Imprisoned behind the nearby metal gate at Q, another zombie-like failed experiment will rise and attack when you come near it. The path heading west from here leads to the experiment Reptilian Appetite Conditioning, an explanatory note and a locked chest with minor loot.
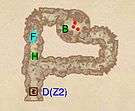
When you are done exploring the many chambers, locate door O and fight the boss-leveled Flesh Atronach (A) guarding the boss urn at B. From here you can choose to access two zones: to the north is a macabre detour to Xaselm, Corpse Pit through door D, while heading east leads to the Xaselm, Sanctum of Vivisection.
Occupants:
- 1 boss-level Flesh Atronach at location A on map
- 2 Baliwogs (unique variant)
- 3 Failed Experiments (non-respawning)
- 6 Undead (special list; equal chance Flesh Atronach, Skeleton, or Skinned Hound|, all leveled)
- The following occupants (orange circles on map) are found within Relmyna's experiment chambers:
- 2 Victims (non-respawning)
- 1 Ravenous Hunger (unique variant)
- 1 Hulking Scalon (unique variant)
- 1 Decrepit Shambles (unique variant; drops Bonemeal and Bone Marrow)
- 2 Shambles (unique variant; drops Bonemeal and Bone Marrow)
- 2 Skinned Hounds (unique variant)
Treasure:
- 1 boss-level Urn (Undead variety) at location B on map
- 1 Chest (locked)
- 2 Urns (Healing)
- The following alchemy equipment will always be found: 2 Novice Alembics, 2 Novice Calcinators, 4 Novice Mortar & Pestles, and 1 Novice Retort
- The following books will always be found: 1 Hunger vs. Shambles, 1 Project Hound's Blood - Day 7, 1 Reptilian Appetite Conditioning, and 1 Week-old blood
- The following ingredients will always be found: 3 Bonemeal, 4 Mort Fleshes, and 4 Void Essences
- The other following items will always be found: 1 Emerald, 3 Weak Potions of Healing, and 2 Weak Potions of Might
- The following plants will always be found: 3 Root Stalk plants and 4 Withering Moon plants
- Some of the above items are clustered at the following locations:
- At F: 1 Bonemeal, 1 Novice Alembic, 1 Novice Mortar & Pestle, and 1 Urn (Healing)
- At G: 2 Bonemeal, 1 Novice Alembic, and 1 Novice Mortar & Pestle
- At H: 3 Mort Fleshes, 2 Novice Calcinators, 2 Novice Mortar & Pestles, 1 Novice Retort, 4 Void Essences, 3 Weak Potions of Healing, and 2 Weak Potions of Might
Traps:
- 7 Dart traps at locations I and J on map
- 1 Trapped Floor trap at J (opens to reveal dart traps)
Doors and Gates:
- There are three doors in/out of this zone
- 1 door (at C) leads to the zone Xaselm
- 1 door (at D) leads to the zone Xaselm, Corpse Pit
- 1 door (at E) leads to the zone Xaselm, Sanctum of Vivisection
- 1 Metal Door at O (locked, says 'key required' but there is no key)
- 13 Metal Gates (initially closed bar gates) at K, L, M, N, P, Q, R, S, T, U, V, W, and X
Other:
- 1 dead Test Subject at location Y on map
Zone 3: Xaselm, Corpse Pit[edit]
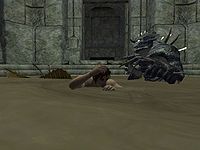
The Corpse Pit is obviously where Relmyna Verenim dumps her test subjects and failed experiments when they are no longer useful to her. For the easiest exploration, jump down the hole opposite door D and loot the hollowed amber limb at H. Wade through the corpse-filled water until you reach the boss leveled Urn at B, protected by three Failed Experiments, who will all wake from their slumber when you approach. After the fight, follow the tunnel around and exit the same way you came.
Occupants:
- 3 Failed Experiments (non-respawning)
Treasure:
- 1 boss-level Urn (Undead variety) at location B on map
- 1 Hollowed Amber Limb (1-4 Amber; non-respawning) at H
- The following plants will always be found: 2 Root Stalk plants and 15 Withering Moon plants
Doors and Gates:
- There is one door (at D) in/out of this zone, leading to the zone Xaselm, Experiment Chambers
Other:
- 2 dead Test Subjects at locations F on map
Zone 4: Xaselm, Sanctum of Vivisection[edit]
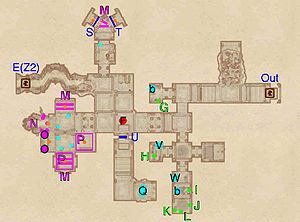
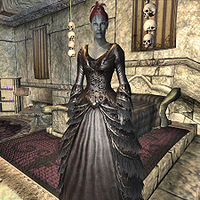
When you enter the Sanctum you will be met with screams and cries from victims being tortured by Relmyna Verenim, all in the name of research. This is the home of the insane sorceress and her apprentice Nanette Don; and there are no enemies to be found, except for those unwillingly participating in the experiments. Upon entering, follow the root tunnel until you will arrive in a large hall. The door to the immediate left leads to yet another experiment (M) while the hall itself has several paths to choose from. Around the corner to the left lie two failed experiments, both of them resembling Flesh Atronachs, probably leftovers from the nearby experiment room. Heading west from the main hall lands you in Relmyna's main torture chamber, where you will find her busy torturing, killing and reviving four unfortunate victims while scribbling down in her notebook and commenting on her results. All four chambers can be tested by you (see this section for details) and the table holds the note Experiment Log – Day 12.
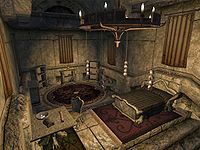
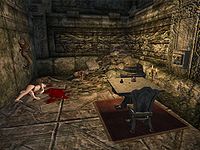
The path to the east contains several rooms, including the private quarters of the two sorceresses. Nanette's room lies to the north and contains nothing but her bedroll (b), a few samples of bonemeal (G), some alchemical apparatus and several body parts. Relmyna's quarters are to the south and are separated into three rooms: a prayer room with a bust of Sheogorath, a storage room with a dead test subject (V), various body parts and bonemeal (H) and a bedroom. Her bedroom contains a large double bed and a whole slew of ingredients, including hound tooths, void essence, bone marrow and a single scalon fin, along with alchemical apparatus. The shelves hold a small book collection along with two weak potions of might and three weak potions of healing (all at L, K and J). On the table sit several pieces of jewelry, an unlocked jewelry box and Relmyna's Unproductive Musings (I). Opposite the table, in a kennel, lies Relmyna's Skinned Hound (W), who obviously died a long time ago. Opposite Nanette's room, a set of stairs leads to the alternative exit (Out).
Once you reach stage 70 of the related quest, the secret wall at U will lower and give you access to the many body parts needed to rebuild the Gatekeeper.
Occupants:
- Relmyna Verenim (non-respawning) at location F on map
- Nanette Don (essential)
- 5 Victims (non-respawning)
- 2 Flesh Atronachs (unique variant; no Void Essence; non-respawning)
Treasure:
- 1 Cupboard (non-respawning)
- 1 Jewelry Box (contains 1-2 unenchanted jewelry, 10% chance enchanted jewelry, 10% potions; non-respawning)
- The following alchemy equipment will always be found: 2 Novice Alembics, 2 Novice Calcinators, 2 Novice Mortar & Pestles, and 2 Novice Retorts
- The following books will always be found: 1 An Elytra's Life, 1 Bark and Sap, 1 Experiment Log - Day 12, 1 From Frog to Man, 1 Myths of Sheogorath, 1 The Blessings of Sheogorath, 1 The Liturgy of Affliction, 1 The Living Woods, 1 The Shivering Apothecary, 1 The Shivering Bestiary, 1 Unproductive Musings, and 1 Zealotry
- The following ingredients will always be found: 2 Bone Marrows, 1 Bonemeal, 2 Hound Tooths, 14 Mort Fleshes, 1 Scalon Fin, and 2 Void Essences
- The other following items will always be found: 1 Flawless Topaz, 1 Pearl, 1 Ruby, 3 Weak Potions of Healing, and 2 Weak Potions of Might
- The following plants will always be found: 3 Root Stalk plants and 4 Withering Moon plants
- Some of the above items are clustered at the following locations:
- At G: 4 Mort Fleshes, 1 Novice Alembic, and 1 Novice Retort
- At H: 9 Mort Fleshes
- At I: 1 Flawless Topaz, 1 Jewelry Box (contains 1-2 unenchanted jewelry, 10% chance enchanted jewelry, 10% potions; non-respawning), 1 Pearl, 1 Ruby, and 1 Unproductive Musings
- At J: 1 Cupboard (non-respawning), 2 Hound Tooths, 1 Novice Alembic, 2 Void Essences, 1 An Elytra's Life, and 1 Bark and Sap
- At K: 2 Bone Marrows, 1 Bonemeal, 1 Novice Mortar & Pestle, 1 Scalon Fin, 2 Weak Potions of Healing, 2 Weak Potions of Might, and 1 The Shivering Bestiary
- At L: 1 Novice Calcinator, 1 Novice Retort, 1 Weak Potion of Healing, 1 From Frog to Man, 1 Myths of Sheogorath, 1 The Blessings of Sheogorath, 1 The Liturgy of Affliction, and 1 The Shivering Apothecary
Traps:
- 21 Dart traps at locations M on map
- 6 Root Spikes traps at N
- 2 Hunger Statue traps at O
- 4 Trapped Floor traps at P
Doors and Gates:
- There are two doors in/out of this zone
- 1 door (at Out) leads outside
- 1 door (at E) leads to the zone Xaselm, Experiment Chambers
- 2 Metal Gates (Initially closed bar gate) at S and T
- 1 Secret Wall at U
Other:
- Parts for rebuilding the gatekeeper at location Q on map
- 1 dead Test Subject at V
- 1 Relmyna's Skinned Hound (dead) at W
- 1 bed at b
- 1 bedroll at b
Experiment Guide[edit]
In the Experiment Chambers and the Sanctum of Vivisection, several rooms of bizarre experiments can be found. It is possible for the player to participate in the fun, by torturing the innocent victims and not-so-innocent creatures by pushing buttons, and to discover what Relmyna's had planned for the experiments. Most of the experiments are described in various notes found throughout the dungeon, while a few are just there for amusement.
Hunger vs. Shambles[edit]
- "While generally an even match, these two Shambles versus a single Hunger, previous experiments have indicated that the presence of a warm body causes the Hunger to increase its ferocity. This territorial hunting imperative is completely lacking in the shambles. They seek to destroy life, not to devour it."
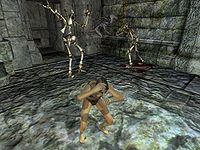
This is merely one large room with free access to three push buttons, designed to control the three unwilling participants. The experiment takes place below a major grate, making it impossible to do anything but watch the events unfold. Relmyna has added a bit of spice and when you arrive, a naked Altmer Victim will sit alone on the floor beneath you, while the monsters can be heard growling from their cages.
- "In this case I have confined a Hunger to his cage, while leaving an unspoiled high elf female in viewing distance. Hungers seem to have a particular thirst for elf maiden blood. And this one, on the verge of flowering, should be a particularly irresistible morsel."
The button on the western wall will open all three gates down below, freeing two Shambles and a Hunger fighting over the naked virgin, obviously motivated by her purity. The button in the corner will cause the dart trap above to shoot on the contestants above, making escape ever harder for the High Elf. The last button removes the floor underneath them, thus ending the fight with a single push.
- "I hypothesize that the hunger will fight with greater force and precision in the up coming battle, after I let the creature and elf maiden stew awhile in each other's proximity."
- (excerpt from Hunger vs. Shambles by Relmyna Verenim)
Unknown Experiment[edit]
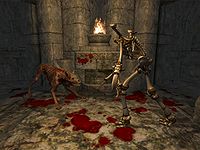
The purpose of this experiment is unknown, as the small table holds none of Relmyna's notes. Underneath the bridge lies a naked female test subject, seemingly disposed of by Relmyna, along with two presumably dead failed experiments. When you get near, one of the experiments will rise from the dead and attack. A button above the small table activates a dart trap located opposite to a headless corpse clamped to the wall. This trap can be used against the resurrected experiment as well.
Week-old blood[edit]
This chamber contains a Skinned Hound and a Shambles, both of them imprisoned in separate cages. Even if this sounds might not seem unusual, reading Relmyna's note will reveal that nothing is what it seems:
- "I have paired up a hound and shambles of equal fighting capacity. However, I have recently drained the hound of its zombie blood, and replaced it with blood extracted from a Breton corpse, which had lain for a week, rotting in the hot sun."
Activating the push button will cause both the hound and shambles to be released and fight each other to the bitter end. Relmyna states she suspects the Breton blood will weaken the dog, and is correct in her hypothesis, as the hound will always end up dead.
- (excerpt from Week-old blood by Relmyna Verenim)
Reptilian Appetite Conditioning[edit]
Reptilian Appetite Conditioning is, as the name suggests, an attempt to heighten the aggressiveness of aquatic lifeforms, in this case two Baliwogs and a Scalon. All three beasts are imprisoned behind iron gates, eagerly waiting to get out and sink their teeth into Relmyna's bait:
- "I have raised these Baliwogs and Scalon together, from hatchling to adult. For the last month, I have been starving them in separate cages, allowing them occasionally to eat, but only tiny amounts of reptilian flesh. I have procured a fatty Breton of previously luxurious lifestyle. There is not an ounce of muscle on him. He should be a most tempting snack, indeed. But we shall see!"
Activating the available push button will cause all of the three iron gates to elevate, thus setting the hungry reptilians free, leaving the naked Breton with nothing but awaiting his fate. Surprisingly, the bait is largely ignored by the Baliwogs and they will instead attack the Scalon. The Scalon is obviously the better fighter and will go directly after the bait, while attempting to keep the Baliwogs distant. If the Scalon wins, it means the death of the Breton. If it is the other way round, the Breton survives and will be forced to spend the rest of his life imprisoned with Baliwogs as his only company.
- (excerpt from Reptilian Appetite Conditioning by Relmyna Verenim)
Flesh Atronachs[edit]
This experiment features two imprisoned and unique Flesh Atronachs fighting to the last breath. There are two push buttons available: the right one raises the iron gates, freeing the Atronachs, which will cause them to fight. The push button on the left will trigger a mean-spirited Dart Trap; an attempt to heighten their bloodlust even further. No documentation about the purpose of this experiment can be found, but the two dead Atronachs next door suggests that Relmyna uses the dead bodies for studying and that the chamber's purpose is to produce cadavers for research.
Relmyna's Torture Chamber[edit]
- "So pitiful was the look on the face of his corpse, that I decide to leave him be, rather than resurrect him. After so many years of scientific study, I still cannot abide apathy. I'm sure that my aversion to pity has colored my findings, as I only make use of strong-willed test subjects. Though I suppose, flawed as my research may be, it is still more revealing and faithful than any other has done before me."
The first cell holds a sad-looking Orc Victim, stripped down to his undergarments and one of Relmyna's favorite test subjects. The ceiling in his cell is completely covered in dart triggers with no escape possibilities. A single button is available to torture the poor soul even further and activating it will cause a shower of darts to hit the Orc, with his inevitable death as a result. Relmyna will later return and revive him.
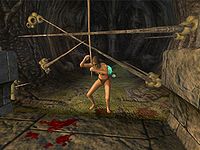
The second cell contains a female Altmer Victim, also stripped and constantly crouching in an attempt to protect herself from Relmyna's spells. Activating the Push Button will torture her even further, as six root spikes will shoot out of the walls, piercing the victim from several angles. She may not die immediately but if she does, Relmyna will "mercifully" revive her for further experiments.
The third cell holds a male Breton Victim, cowering in fear after suffering Relmyna's never ending research. Two buttons are available to worsen his sufferings, one on top of the other, although both will cause the hunger statue in the left corner to kill him right away. As one of Relmyna's favorite test subjects, she will revive him as soon as he dies.
A male Khajiit Victim can be located behind the bars in the fourth cell, and is one of the two victims that Relmyna will stay away from, so your sadistic experiments will cause him to die indefinitely. As in the first cell, the ceiling is covered in Dart Traps and pushing the button will shower him with darts, causing him to die where he stands. As an added bonus, the trapped floor underneath him will then disappear, sending his dead body into a pit of darkness. Pushing the button again will cause the floor to close again.
Blink and you will miss the Bosmer Victim in the fifth cell, which is initially empty. The Bosmer is located above the ceiling and pushing the button will make him fall down at the cell floor and die. Furthermore, the floor will then disappear and send him into eternal darkness somewhere below. Relmyna will not revive this victim and the experiment is one-time-only as the button becomes inactive after one push.
- "The harder I try to remember that innate knowledge, the more it seems to recede from me. The essence that remains is this: Pain is a force that purifies, ennobles, and uplifts. It is the Fire that burns away impurities, that melts away imperfections. Death is not the sign of weakness, nor bodily constitution the sign of strength. It is what happens to soul when brought into the Fire that determines the mettle of men."
- (Excerpts from Experiment Log - Day 12 and Unproductive Musings by Relmyna Verenim)
