Oblivion:Fort Hastrel
|
|||
|---|---|---|---|
| # of Zones | 2 | ||
| Occupants | |||
| Vampires (1 boss-level Vampire) |
|||
| Important Treasure | |||
| 1 boss-level Coffin 1 War Axe of Seduction 2 Arrows of Embers |
|||
| Console Location Code(s) | |||
| FortHastrel01, FortHastrel02 | |||
| Region | |||
| Colovian Highlands | |||
| Location | |||
| North-northwest of Kvatch, east of Niryastare | |||
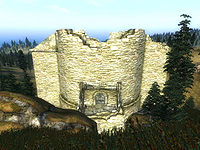
Fort Hastrel is a medium-sized fort north-northwest of Kvatch containing vampires. It contains two zones: Fort Hastrel and Fort Hastrel Keep.
Notes[edit]
- This dungeon contains one of the few guaranteed magic weapons in the game: a War Axe of Seduction found in the second zone, Fort Hastrel Keep.
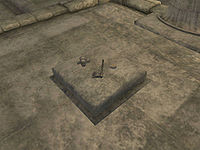
- Two candlesticks in the second zone are subject to a graphical glitch. This issue is present in all recent patches to the game, and can only be repaired on consoles via installation of the Shivering Isles expansion.
- Fort Hastrel also appears in ESO.
Exterior[edit]
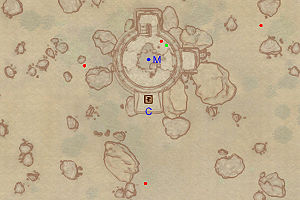
- The exterior is located at coordinates: Tamriel -39, 7
- This location's map marker (M on map) is named Fort Hastrel (editor name FortHastrelMapMarker). The entrance door is S of the marker, 50 feet away.
- 1 Melee Skeleton is near the entrance
- 3 Wilderness Creatures (Highlands variety) are near the entrance
- 2 Chest 01 is near the entrance
- The following potions can be found near the entrance: 1 Potion of Nighteye
- The following plants can be found near the entrance: 6 Fennel plants, 6 Ginseng plants, 3 Lady's Mantle plants, 16 Motherwort plants, and 9 Viper's Bugloss plants
Zone 1: Fort Hastrel[edit]
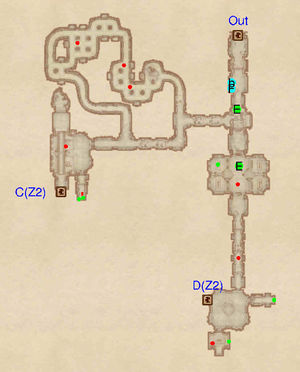
Upon entering the fort, you will find a Dead Treasure Hunter (F) lying next to a bedroll (b) and an Arrow of Embers (on the ground at E).
Continue due south, down a flight of stairs. In the next room a vampire guards four coffins, of which only one has valuable loot, and a second Arrow of Embers (E). In the final room are two alcoves. Each contains a minor loot chest, with the southern one also housing a vampire.
When returning through door C, you will be on the upper level of a room, and able to snipe down at the two enemies below. An alcove to the south contains two more minor loot chests. You can make your way back to exit quickly by keeping to the right and following the corridors. Alternatively, turn left and pass through a series of rooms containing three enemies but no loot.
Occupants:
Treasure:
- 2 Arrows of Embers at locations E on map
- 1 Chest 01 (locked)
- 2 Chests 02 (1 locked)
- 1 Chest 04
- 1 Coffin 02
Doors and Gates:
- There are three doors in/out of this zone
- 1 door (at Out) leads outside
- 2 doors (at C and D) lead out of dungeon to Fort Hastrel Keep and Fort Hastrel Keep
Other:
- 1 Dead Treasure Hunter (carries light armor, one weapon, unenchanted loot) at location F on map
- 1 bedroll at b
Zone 2: Fort Hastrel Keep[edit]
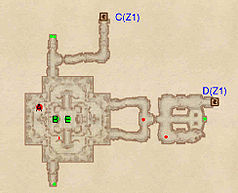
After entering from door D, head left to loot a chest before proceeding west. Fight your way past a rat and another enemy before arriving in the main room. This is structured around a large central column. On top of it, at E, you will find a War Axe of Seduction, a pair of steel gauntlets and a cheese wedge. If your Acrobatics is at least 50, you can reach the top of the platform by first jumping onto the small ledges on its sides and then onto one of the four stone walkways connecting it to the walls.
The room also contains up to two enemies, one of which one is a boss-level vampire (A), a boss chest B and a minor loot chest. Head north, loot the two chests in the alcove nearby, and return to the previous zone via door C.
Occupants:
- 1 boss-level Vampire (50% chance Vampire Matriarch, 50% chance Vampire Patriarch) at location A on map
- 1-2 Vampire Enemies (each 50% probability Vampire, 33% Undead, 17% Vampire Beast)
- 1 Rat
Treasure:
- 1 boss-level Coffin (Vampire variety) at location B on map
- 1 War Axe of Seduction at E
- 1 Chest 02 (locked)
- 2 Chests 04
- 1 Coffin 01
- The other following items will always be found: 1 Steel Gauntlets and 1 Cheese Wedge, both found at E.
Doors and Gates:
- There are two doors (at C and D) in/out of this zone, both leading to the zone Fort Hastrel
