Skyrim:Haemar's Shame
|
|||
|---|---|---|---|
| # of Zones | 2 | ||
| Clearable | Yes | ||
| Dungeon | Yes | ||
| Respawn Time | 10 days or 30 days | ||
| Level | Min: 6 | ||
| Occupants | |||
| Vampires, Frostbite Spider | |||
| Important Treasure | |||
| Response to Bero's Speech | |||
| Console Location Code(s) | |||
| HaemarsShameExterior01, HaemarsShameExterior02, HaemarsShame01, HaemarsShame02 | |||
| Region | |||
| Falkreath Hold | |||
| Location | |||
| East of Helgen Southwest of Ivarstead |
|||
| Special Features | |||
| # of Alchemy Labs | 1 | ||
| # of Arcane Enchanters | 1 | ||
| # of Cooking Pots/Spits | 1 | ||
Haemar's Shame is a medium-sized cave east of Helgen containing vampires. It contains two zones: Haemar's Cavern and Haemar's Shame.
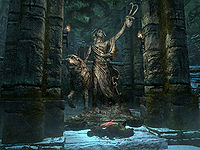
The cave also features the shrine to the Daedric Prince Clavicus Vile.
Related Quests[edit]
- A Daedra's Best Friend: Help Barbas reunite with his master.
- Culling the BeastDG: Kill the thin-blooded vampires. (radiant)
- Onmund's Request: Help Onmund negotiate the return of a family amulet from Enthir. (radiant)
- This location is one of many potential targets for one or more of the Radiant quests.
Walkthrough[edit]
Exterior[edit]
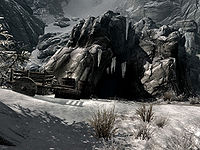
The entrance is in a pass through the snow-covered mountains that leads between Helgen and Ivarstead. To the left of the main entrance are three unusable barrels and an empty cart, while on the ground in front of the entrance are splattered blood stains. There is also a second entrance, in the mountains to the northwest of the main entrance. However, this cannot be used as a practical entrance, due to spears blocking progress a short distance into the cave when entered from that direction.
Haemar's Cavern[edit]
The entrance leads into a natural tunnel, which after a few paces turns south. The passage opens into a chamber featuring a large wooden scaffold opposite, with two food barrels beneath it. There is a vampire thrall at the top of the structure. A wooden ramp leads up to a small table and chair, with three loose iron arrows on the table. Next to the table is an unlocked chest. The way forward is to the east. The passage takes several turns before opening into another chamber. There is a pressure plate at the top of a wooden ramp which triggers a spike wall trap, and a leveled vampire patrolling the bottom of the ramp.
The ramp leads down to a campfire with a small table and chair facing away from you; a vampire thrall sits at this table, which has gory human bones in bowls on top. There is a charred skeever on a spit cooking over the fire, which can be harvested for a charred skeever hide. Behind the campfire are two food barrels and a raised wooden platform in the southern corner of the room, where a leveled vampire is standing. On the platform, on the left is a small table and chair covered in blood holding an iron helmet. Next to this table is a cooking pot, with a cupboard next to the pot holding a filled petty soul gem and copies of The "Madmen" of the Reach, Ruins of Kemel-Ze, Biography of Barenziah, v1, Biography of Barenziah, v2, and The Song of Pelinal, v1 on the shelves. To the right of the cupboard is an unlocked chest. Farther to the right is an alchemy lab, and another small table and two chairs with an iron dagger on top. Above the lab is a rabbit hanging from a rack, with a pheasant on the floor underneath, both of which can be harvested. Under the ramp are two sets of shelves holding a random helmet, a bowl of frost salts, a bowl of void salts, a random healing potion, a random magicka potion, and two further random potions. There are also two coffins under and on the platform. The exit from the cave is to the west, passing on your right yet another table, this one with a dead Imperial and a woodcutter's axe on top and an iron dagger beneath it.
The passage turns and continues to descend before opening into another chamber with two levels. Around the outside where you enter is a raised level, while in the middle is a lower level. There is a wattle fence around the edge of the drop, with a leveled vampire on your right and a vampire thrall on your left patrolling the top level. There is also a leveled vampire on the lower level who may be alerted to any fighting. On the upper level is a tunnel to the south leading to a small room, which contains a set of shelves holding a ruined book, a potion of ultimate magicka, a potion of minor healing, a goat cheese wedge, a bottle of wine, a food sack, and copies of The Real Barenziah, v3, and v4. To the southwest is a small table holding an iron dagger, and against the west wall is an adept-locked chest. There are also two empty hanging cages and three coffins in the room.
Back in the two-level cave, there is a wooden ramp down to the lower level in the northwest corner. Following the ramp down, you will see that it splits to the left and right. To the left, the ramp continues down to a tunnel heading north into the next zone, Haemar's Shame. To the right is a table and chair, with a leveled vampire sitting in the chair unless they've already been dealt with. There are three dead bandits between the bottom of the ramp and the table. If you alert the vampire sitting at the table at any point, they may raise these bandits to aid them in the fight. On the table are two ruined books, two random potions of healing, a deadly aversion to magic poison, and copies of Antecedants of Dwemer Law and the Destruction skill book Response to Bero's Speech. There are two sets of shelves behind the table holding copies of Aedra and Daedra, Dwemer Inquiries Vol III, Song of the Askelde Men, and Mixed Unit Tactics, as well as a gourd and a ruined book. There is another set of shelves to the right of the table holding copies of The Book of Daedra, Ancestors and the Dunmer, two copies of Chance's Folly, The Song of Pelinal, v5, Mystery of Talara, v 1, The Wolf Queen, v7, Brief History of the Empire, v3, and Brief History of the Empire, v4, as well as three ruined books. There is also a bench and two coffins nearby. Return to the north and take the exit to Haemar's Shame.
Haemar's Shame[edit]
Following the tunnel east, then south, it opens into a chamber containing a frostbite spider; once it is dealt with, there are two spider egg sacs that can be harvested. Another tunnel continues to the south, turning twice before opening into a room with several hanging cages, a table holding an iron dagger and a salt pile, and a second table with a built-in arcane enchanter and a random soul gem. There is also an unlocked chest and a set of shelves opposite; on the shelves are copies of Antecedants of Dwemer Law, Brief History of the Empire, v1, Brief History of the Empire, v4, The City of Stone, and Spirit of Nirn, as well as another iron dagger. The tunnel continues west then back to the east, following a stream, with a vampire thrall patrolling the area.
The passage turns south, west, and south again, finally opening into another two-level cave. On a ledge ahead is the shrine of Clavicus Vile, while a leveled vampire is to your left. The boss and one other vampire will be at the bottom near the front of the shrine, with the final vampire up the stairs behind the shrine. A dead bandit is near the bottom of the earthen ramp that leads down to the bottom level, while a dead Imperial in front of the shrine may be raised by the vampires. Once the enemies have been dealt with, you will find in front of the shrine a leg of goat, a haunch of horse meat, and two stone bowls containing two loaves of bread and seven red apples. Stairs on either side of the shrine lead up to a raised area behind the shrine, where an unlocked boss-level chest and a shortcut exit are found. The exit is blocked by spears, which are lowered by a chain on the right.
Notes[edit]
- Prior to the start of the quest A Daedra's Best Friend, the statue of Clavicus Vile has a dog, Barbas, at his side. During the quest, the dog disappears from the statue, and only returns depending on your choices.
Bugs[edit]
- The game may crash in this location if you have completed A Daedra's Best Friend.
- The Official Skyrim Patch, version 1.4, fixes this bug.
- Skyrim-Places-Caves
- Skyrim-Places
- Skyrim-Places-Level 6
- Skyrim-Places-Falkreath Hold
- Skyrim-Places-Alchemy Labs
- Skyrim-Places-Arcane Enchanters
- Skyrim-Places-Cooking Pots
- Skyrim-Places-Clearable
- Skyrim-Places-Discoverable
- Skyrim-Places-Vampire Lairs
- Skyrim-Places-Ice Caves
- Skyrim-Places-Daedric Shrines
- Skyrim-Bugs Fixed by the Official Skyrim Patch

