Redguard:First Time Players
Welcome to Redguard, an action-adventure spin-off in the Elder Scrolls series! Redguard lets you explore Stros M'Kai, an important island off the coast of Hammerfell. During your adventure, you will face many enemies, explore a variety of dungeons, and solve difficult puzzles.
This page serves as an introduction to the game, especially for first time players, and highlights the most important gameplay elements. For additional topics that may contain spoilers or provide too much of an advantage to first time players, see the Hints page. A complete walkthrough of the story can be found on the Quests page.
Contents
Cyrus[edit]
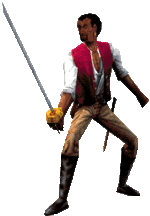
In Redguard, you do not create a character and there are no skills or levels to increase. You play as Cyrus, a Redguard mercenary in search of his sister Iszara, who has recently gone missing. The introduction cutscene that plays when you start a new game does a good job of explaining recent events, but it does not cover Cyrus' past. Before getting too far into the story, it would be a good idea to read The Origin of Cyrus!, a comic book that shipped with the game. This will make it easier to understand the conversations he has with several people, notably Tobias.
Pocket Guide to the Empire, 1st Edition also came with the game and provides an extensive overview of the lore created up to this point in the series. While optional and not nearly as relevant as The Origin of Cyrus!, it adds further context to the story. The comic book and pocket guide can both be read on the wiki.
New Game[edit]
Review the controls listed on this page before starting a new game. You cannot easily change the settings until you are already in combat, so keep in mind the default keys for movement, attack, and defend.
If this is the first time you have started the game or you have no saves, a new game will automatically start. After the introduction cutscene, all you have to do is kill the two League pirates who have boarded your ship. For more details about this quest, see the page for Starting Out. Refer to the Combat section below if you are having trouble defeating them.
You soon arrive in the harbor of Stros M'Kai. The letter you received from Tobias suggests that you go meet him at the Draggin Tale Inn, but at this point you are free to explore the entire island. See the Quests page for information on how to progress the story. In general, talking to the people around you will give you plenty of options to consider. Refer to your log to review important dialogue and events.
Listed below are all the things you may want to do upon arrival:
- Finish the quest Starting Out by talking to Tobias.
- Travel to the Isle of N'Gasta (N'Gasta's Amulet)
- Explore the Goblin Caverns (The Archmage's Ring)
- Explore the Dwarven Ruins (Investigate the Ruins)
- Obtain a League insignia (Contact the League)
- Find map pieces to the Flask of Lillandril (A Legendary Flask)
- Befriend the Yokudans (Save Hayle's Soul)
- Buy items at Gerrick's Goods, J'ffer's Books, or the Mage's Guild
- Find an island map
- Find a glass bottle and strange potions at the alchemist's shack west of town
Dialogue[edit]
As mentioned above, talking to people is a good way to figure out what your next objective is. NPCs have a lot to say about recent events as well. The dialogue system is topic-based, with each topic triggering a short conversation between Cyrus and the person. Some topics open up a list of subtopics you may ask for further information and a "back" option to return to the main list. In some cases there is no back option, usually when a decision is involved.
You can skip dialogue by pressing the SHIFT key. It's a good idea to exhaust all of a person's topics, even if you don't listen to them, because it unlocks more topics that may provide useful information.
Combat[edit]
Throughout your adventure, you will encounter many foes, including guards, goblins, Dwarven centurions, and skeletons. Mastering the longsword will take some time, so you should practice with the Forebear bullies in the Draggin Tale at the beginning of the game. Their attacks do not hurt you and you can brawl with them as many times as you want without alerting the guards.
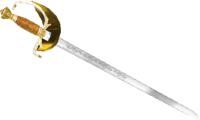
Press the S key (default) to quickly pull out or sheathe your sabre. Assuming you have auto-defend on (press F7 to toggle), you should hold the ALT key whenever you aren't moving or attacking. As long as you face your opponent, you will block their attacks. Sidestep around them by holding SHIFT and moving left or right. You can also run while holding SHIFT and moving forward.
There are a few common strategies to succeed in combat. One is to step back and then thrust your sabre forward as your opponent moves in. Another is to continue blocking and counterattacking with a single strike. Eventually, the opponent will have their defenses open at the right time. A more advanced technique is to wait until your enemy lunges, then sidestep out of the way and attack several times while they cannot defend.
To consistently hit your target, make sure to align yourself with them, using Cyrus' forward foot as a guide. Stay within range to hit, but keep enough distance to effectively sidestep or retreat. Their accuracy is lessened when you maintain this spacing. Watch for openings in their defenses. When fighting multiple opponents, they switch off between attacking and standing by, and if you aren't careful they can hit you from the side or behind. Ultimately, be patient and do not try to rush the fight. You will likely take excessive damage from a single enemy.
You can buy or find strength and ironskin potions to aid you in combat. Both last for 3 minutes and double your damage or halve the damage you receive, respectively. Drink one or both if you think an enemy you see ahead of you will be difficult. Do not drink them in combat, however, because you'll be vulnerable during the drinking animation.
Cyrus can perform the following moves:
- Single Slash
- Press the attack key once to swing your sabre. This is a good way to do a bit of damage when your opponent lowers their defenses.
- Double Slash
- Slash again with another press of the attack key to deal additional damage. However, you are more open to attacks.
- Triple Slash
- Pressing the attack key a third time will do even more damage. Save this combo for moments when your opponent cannot easily attack you; for example, when they lunge with their sword and you sidestep behind them.
- Thrust
- Use the forward key and attack key simultaneously to thrust your sabre. This attack is similar to a single slash, but lets you avoid the defensive risks of multiple slashes.
- Lunge
- This is a difficult attack to perform, and you may end up using it accidentally when you intend to thrust. To lunge, press the forward key, followed immediately by both the forward and attack keys. This attack has the farthest range, more than double a regular slash, though you sacrifice defense.
- Jump Attack
- It is possible to swing your sabre after jumping, though the move is awkward to use correctly. Jump attacks work best when downhill from your opponent. Getting hit as the jump is beginning will prevent attacking, but once you are in the air you cannot be hit.
Healing[edit]
Your health is shown in the top-left corner as a candle that dims as you lose health. Inevitably, you will lose a lot of health over the course of the game. There are a variety of ways to heal yourself, though not all of them can be used during combat.
You can press the H key in combat to immediately restore health if you have any of these items. Try to avoid using these if you have more than 85 health (or 95 for glass bottle with pure water). You heal to 100, but lose the potion's full effect.
- Health Potion — You start with six of these. They restore 15 health and can be purchased for 25 gold at the Mage's Guild.
- Glass Bottle with Pure Water — Find a glass bottle at the alchemist's shack west of town and fill it with water from the public well. You can use it 20 times to restore 5 health. The H key prefers health potions, however.
- Pure Water and Aloe Mix — Add aloe to the water first and you obtain this instead. It also has 20 uses but they restore 15 health. The H key prioritizes this over health potions. Aloe can be purchased at Gerrick's Goods three at a time for 15 gold total.
Gold[edit]
The primary purpose of gold is to buy items at Gerrick's Goods, the Mage's Guild, or J'ffer's Books. You can only carry 500 gold at a time, and the amount you'll find in pouches and on fallen enemies can make it more of a challenge to use the gold you have. You might find yourself in a dungeon unable to pick up more if you don't spend it regularly. Make sure to have a few pieces left over still, for example to tip Avik the snake charmer.
Island Map[edit]
An island map is useful for keeping track of where you are on Stros M'Kai and the Isle of N'Gasta. Surprisingly, you cannot buy one from the local Cartographer's. Instead, you must kill an island thug; six of them can be found on Stros M'Kai. The closest thug to town is at Devils Den, a small cave hideout to the northwest.
Fast Travel[edit]
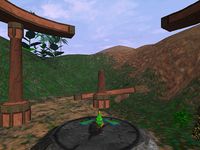
Redguard doesn't have instant travel from any location, but there are six shrines of Kynareth across the island. You can offer the goddess a canah feather to be transformed into a canah and flown to the shrine closest to the direction you are facing. Gerrick's Goods sells canah feathers for 10 gold each, a worthwhile investment if you want to save some time.
See this map for the locations of all the shrines.
Dungeons[edit]
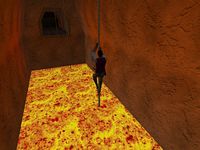
Dungeons are some of the longest and most difficult sections of the game. These are where you'll solve the majority of the game's puzzles and face the greatest number of enemies. Perhaps the most difficult part, however, is when you are required to jump over gaps or swing from ropes. Dangers may include lava, acid water, and bottomless pits.
Before attempting any jump, make sure to save first. You can quick save by pressing the F9 key. Use the SHIFT key to walk, or press TAB to enable walk mode. Walking allows you go to the edge without falling off. This is especially useful if you are standing on a small platform and need to change your position. Jumps typically need to be done while running forward, and some require that you jump from the very edge.
Swinging from a rope is not as unpredictable as jumping once you understand how it works. To start swinging, alternate pressing the left and right arrow keys. The more you swing, the farther you can jump. You can change direction by holding shift with the arrow keys, but this is not often necessary. The up and down arrow keys move you up and down the rope, respectively. Note that you cannot drop from the rope this way. Sliding to a point just above the bottom is typically the best position.
