Online:Spindleclutch I
|
||||
|---|---|---|---|---|
| Group Dungeon | ||||
| Discoverable | Yes | |||
| Completion | Objective | |||
| Dungeon | Yes | |||
| # of Zones | 1 | |||
| Zone | ||||
| Cambray Hills, Glenumbra | ||||
| Location | ||||
| Northern Glenumbra | ||||
| Instanced Dungeon | ||||
| Min Level | 10 | |||
| Group Size | 4 | |||
| Bosses | 2 | |||
| Mini-Bosses | 3 | |||
| Veteran Speed Run Target | 20 mins | |||
| Loading Screen | ||||
 The Ayleid ruins of Dwynnarth that grin down from the bluffs above Hag Fen were plundered and emptied out generations ago. But it seems there are forgotten mine tunnels beneath the lowest levels of Dwynnarth that might not be quite so empty.
|
||||

Spindleclutch I is a group dungeon found in northern Glenumbra.
The cave is infested with spiders, although something more sinister lurks within. Praxin Douare wants your help clearing the cave of spiders and other possible threats. In Spindleclutch I, a constant, pervasive whispering sound is present throughout the dungeon, and only gets louder as you descend through the caves.
You can learn about its location from Mindil the Untested in Vulkhel Guard, Mighty Mordra in Daggerfall, or Roaring Ramavel in Davon's Watch.
Its dungeon sets are Knightmare, Prayer Shawl, and Spelunker. Its final boss, The Whisperer, has a chance to drop the Goblet Gorget antiquity lead for the Bloodlord's Embrace.
Related Quests[edit]
- Spindleclutch Objective: Explore the Spindleclutch caverns. / You braved the dangers within the Spindleclutch caverns.
 Deadly Whispers: Aid the Fighters Guild members in clearing the Spindleclutch I caves.
- One of the Undaunted: Join the group of adventurers called "The Undaunted".
 Pledge: Spindleclutch I: Explore Spindleclutch I and return Undaunted.
-
Spindleclutch Pledge: Explore Spindleclutch and return Undaunted.(disabled since Patch 2.6.4)
Characters[edit]
|
Enemies[edit]
Normal Enemies[edit]
- Corrupted Evoker
- Corrupted Healer
- Corrupted Guardian
- Corrupted Infantry
- Corrupted Knight
- Spiders
- Spider Hatchling
- Spider Swarm
Minibosses[edit]
- Spindlekin, a giant spider
- Cerise the Widow-Maker, a corrupted Breton berserker
- Big Rabbu, a corrupted Redguard brute
Bosses[edit]
- Swarm Mother, a spider queen responsible for the spider infestation
- The Whisperer, a spider daedra responsible for driving the Fighters Guild members insane
Boss Mechanics[edit]
Spindlekin[edit]
Spindlekin is the first mini boss. It behaves like an ordinary spider, and does not have any unique abilities. The only difference between Spindlekin and the smaller spiders in the room is that Spindlekin does more damage than they do. Spindlekin does not need to be killed in order to progress.
Swarm Mother[edit]
The Swarm Mother summons Spider Hatchlings when her health drops to 75%, 50% and 25%. It is important for anyone targeted by her heavy attack to block, as her target will be sent flying if they don't block the maneuver. There's not much to worry about when fighting the Swarm Mother.
Cerise the Widow-Maker and Big Rabbu[edit]
Cerise the Widow-Maker is a normal berserker. Aside from having more health than the average NPC, she poses little threat to your group. Interrupt her when prompted and use area of effect abilities to help you melt down the enemies near her.
Big Rabbu is further down the hallway from Cerise. He is a knight, and shouldn't be too difficult for the group to take down. Keep in mind that he can use Fiery Grip to pull people closer to him, and remember to block if you're in his line of sight when he charges. Blocking his charge will stun him for a few seconds.
The Whisperer[edit]
The fight against the Whisperer is fairly simple, but she can kill you easily if you lower your guard. The first thing you should keep in mind is that she has two abilities that she throws at you: a poison damage over time and a fear mechanic. If she turns to look at you and throws green or blue matter at you, roll dodge.
- The green goo is the poison DoT. If it hits you, you will take a lot of damage, be knocked backwards and stagger.
- The blue wisp she throws will force you to pause and cower in fear for five seconds. You'll know you've been hit by this ability if your character stops and the world turns blue as ghostly spiders descend from the ceiling.
The most dangerous ability of hers is the large damage circle that she channels on occasion. Try not to stand in it while it explodes, and be sure to roll dodge if you need to. The Whisperer is also capable of using webs to drag players towards her. Sometimes, she does this right before channeling her damage circle, so pay attention if she pulls you close to her, and put a little bit of distance between you and her as necessary.
The Whisperer is not leashed; if you accidentally catch her attention, say, before reading the Scroll of Glorious Battle on vet to engage hard mode, you'll need to wipe the group or kill her to get her to stop attacking you. She will chase you throughout the entire dungeon if you try to run away. It is entirely possible for you to aggro her and drag her all the way to the dungeon's entrance. Try not to engage her in combat until you're ready.
Pay attention to the Whisperer. Watch her in case she throws anything at you and stay out of her big red circle.
Layout[edit]
There are two different kinds of ordinary spiders in Spindleclutch: small blue spiders, and larger black widow-patterned spiders. Both variants have the same amount of health. The Whisperer will speak to you for the first time after you defeat the first group of spiders. She'll speak again after you defeat the second group of spiders. The first boss, Spindlekin, is located in the back of the northern half of the first room full of enemies. A chest and heavy sack can spawn behind Spindlekin. The first half of the dungeon is rife with spiders and spider swarms. Dead guild blades are strewn about everywhere. The Whisperer's Song, Verse 1 is located at the mouth of the tunnel leading beyond Spindlekin's lair. A heavy sack can spawn beside the corpse of a guild blade, which is slumped against the wall past the first corner, on the right-hand side of the tunnel.
The next boss, the Swarm Mother, lies in the next chamber: the central-northern chamber. The Whisperer speaks once again when you enter this room. A chest can spawn in the southern alcove just to the right as you enter the room. A heavy sack can spawn next to a crate beside a bedroll near the stairs. The Swarm Mother descends from the ceiling after you approach the door on the eastern side of the room. Most groups will kill all of the weaker spiders before summoning her. The door only opens once the boss is dead; the Whisperer will also speak to you again at this point. The Whisperer's Song, Verse 2 is located just inside the tunnel exiting the Swarm Mother's room. A chest can spawn across from the book.

You'll start encountering ensorcelled Fighters Guild members in the next half of the dungeon. The whispers are more prominent in this section. The Whisperer will address you while you're passing through the large chamber just past the Swarm Mother's room. The Whisperer's Song, Verse 3 is at the southern end of this room. A chest can spawn to the right as you enter the tunnel containing the first group of Fighters Guild enemies, in the hallway lit by blue welkynd stones. There are two more chest spawn points in this hallway; one is next to the welkynd stone in the middle of the hallway (beside the wall on the right-hand side), and the other is ahead of that and to the left, beside a crumbling Ayleid wall. The Whisperer will speak to you while you're killing this first group of enemies. The next mini boss, Cerise the Widow-Maker, lies beyond this hallway. She is accompanied by a large entourage of corrupted guild members. A heavy sack can spawn near the altar behind Cerise. Engaging any of the guild members in combat will likely cause Cerise to notice you.
A chest can spawn just north of Cerise, behind a boulder. You'll find Mereel strung up on a crucifix just ahead. The lorebook Where Magical Paths Meet is near her if you have not collected it yet. Faulor is a little ways further south, next to Big Rabbu, the last mini boss. The Whisperer speaks once more when you approach Big Rabbu.
After freeing them, you can speak with Mereel and Faulor to convince them to grant you Fighter's Boon, a buff, which lasts for two minutes. You'll need to persuade Mereel and intimidate Faulor in order to receive their buffs. You'll lose the buff if you die before the allotted time passes. You can only have one instance of the blessing active at a time. If you receive it from Mereel, you cannot get it from Faulor until the two minute timer has depleted. It can be granted more than once by the same NPC, and the passive effect persists if you still have it when you leave the dungeon.
You'll need to pass through a webbed chasm to reach the Whisperer. The hallways ahead are filled with corrupted guild members. A heavy sack can spawn in the southeastern corner of the room. A chest can spawn beside a welkynd stone against the wall to the right, just before you cross the webbed chasm, and another can spawn in the southern portion of the web crossing the chasm (on the left-hand side). The Whisperer speaks to you again while you're crossing the web. At'avar is located in the southwestern portion of this second to last room. You can free him after the cultists are dead. You don't have to have any passives nor do you need to do any work to convince At'avar to give you the Fighter's Boon. A chest can spawn on the right side of the wall behind the crucifix At'avar is strapped to.
A heavy sack can spawn to the right as you enter the Whisperer's chamber. She curses your name as you approach, and steps forward after all of the corrupted guild members in the room have died. The Scroll of Glorious Battle is at the entrance of the room, to the right. A chest can spawn near it, beside the first crucifix on the right side of the room. Another chest can spawn across from Sud-Hareem, who is being held captive beside the exit door. A chest can also spawn to the left of the Whisperer's spawn location. The door behind the Whisperer leads to Spindleclutch Lair, which is inaccessible in this instance of the dungeon; you'll need to run Spindleclutch II in order to enter the lair.
Books[edit]
- The Whisperer's Song, Verse 1 — Three-part song of the Whisperer
- The Whisperer's Song, Verse 2 — Three-part song of the Whisperer
- The Whisperer's Song, Verse 3 — Three-part song of the Whisperer
- Where Magical Paths Meet by Warlock Aldaale — On the benefits of Conjuration
Sets[edit]
| Set Name | Bonuses | Location(s) | Set Type |
|---|---|---|---|
| Prayer Shawl |
2 items: Adds 25-1096 Maximum Magicka |
Spindleclutch | Light Armor |
| Spelunker |
2 items: Adds 25-1096 Maximum Stamina |
Spindleclutch | Medium Armor |
| Knightmare |
2 items: Adds 34-1487 Armor |
Spindleclutch | Heavy Armor |
| Swarm Mother |
1 item: Adds 25-1096 Maximum Stamina |
Spindleclutch I | Monster Helm Sets |
Achievements[edit]
There are seven achievements associated with this dungeon:
| Achievement | Points | Description
| |
|---|---|---|---|
| Normal | |||
| Spindleclutch I Vanquisher | 10 | Defeat the Swarm Mother and the Whisperer in Spindleclutch I.
| |
| Veteran | |||
| Spindleclutch I Conqueror | 10 | Defeat Spindlekin, the Swarm Mother, Cerise the Widow-Maker, Big Rabbu, and the Whisperer in Veteran Spindleclutch I. | |
| Quiet at Last | 50 | Defeat the Whisperer in Veteran Spindleclutch I, after invoking the Scroll of Glorious Battle. | |
| Veteran Corrupted Slayer | 10 | Defeat 350 Corrupted in Veteran Spindleclutch I. | |
| Veteran Spider Slayer | 10 | Defeat 600 Spiders in Veteran Spindleclutch I. | |
| Spindleclutch I Survivor | 50 | Defeat the Swarm Mother and the Whisperer in Veteran Spindleclutch I, without suffering a group member death. | |
| Spindleclutch I Assassin | 50 | Defeat the Swarm Mother and the Whisperer in Veteran Spindleclutch I within twenty minutes of starting the dungeon. Timer starts when players engage the first group of spiders. | |
Notes[edit]
- Before dungeon scaling was introduced in Update 5, Normal Spindleclutch was designed for levels 12-15, and Veteran Spindleclutch was designed for Veteran Ranks 1-5.
- Prior to Update 12, Spindleclutch I was only available in Normal mode, and Spindleclutch II was only available in Veteran mode. These were named Spindleclutch and Veteran Spindleclutch respectively.
- Mike Finnagan, Dungeon Lead for ESO, revealed on 23rd June 2016 that there was a standing joke relating to this dungeon among the Dungeon Team. He said, "When developing Spindleclutch, everytime we would mention the name we would make this high pitched hair metal screech of the name and play air guitar. It became this kind of running gag with the dungeon team. It got to the point that we went to Bethesda and asked if we could make shirts for our team so, everyone on the team at the time has a shirt with a stylized Spindleclutch (like an 80s Hair Metal band concert shirt) logo and the teams birthdate and places on the back made to look like tour dates".
Gallery[edit]

Swarm Mother's chamber
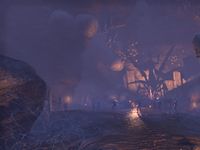
The Whisperer's chamber
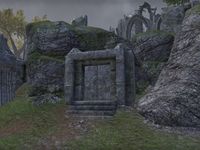
Unused alternate entrance to Spindleclutch, accessed from Dwynnarth Ruins


Maps[edit]
|
A map of Spindleclutch I
|
