Oblivion:The Flesh Spire
| Oblivion Tower: The Flesh Spire |
|
|---|---|
| # of Zones | 5 |
| Important Treasure | |
|
|
| Console Location Code | |
| OblivionRDCitadel01 OblivionRDCitadel01Hall01 OblivionRDCitadel01Hall02 OblivionRDCitadel01Hall03 OblivionRDCitadel01Lord |
|
The Flesh Spire is a large Sigil tower, and one of five randomly chosen Sigil Keeps.
This tower can be visited when accessing the Main Tower from Oblivion Worlds 1, 3, 5, 6 or 7. In order to reach the Sigil Stone on top of this tower, you are required to pass through several hallways before reaching the Sigillum Sanguis. Loot can only be found in the Dead Halls and the Sigillum Sanguis.
Zone 1: The Flesh Spire[edit]
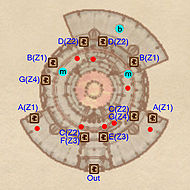
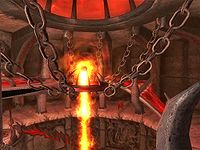
This tower consists of four levels, one ground level and three upper levels. When entering, you can turn right or left and head to the nearest door. That way, you will only encounter one Daedra. Although the two different directions you can choose from are very similar, both paths will not cross until you reach the Dead Halls.
There is little else at this level other than a Blood Fountain at the far end of the chamber, but crossing the chamber will likely alert the other Daedra on this level.
The next level consists only of a small platform, with a Daedra, which you have to cross to reach the door to the Dead Halls.
On the third level you can choose whether to go left or right, but both paths join together after a ramp leading upstairs. At the top you can find a single Dremora and the door to the Corridors of Dark Salvation.
When you reach the upper level, you'll need to walk the winding ramp upstairs. After encountering two Dremora on the way, you will reach both doors to the Sigillum Sanguis.
Occupants:
- Ground level: 3 Daedra creatures
- First level: 2 Daedric occupants (Daedra creatures or Dremora)
- Second level: 1 Dremora
- Third level: 1 Dremora
Traps:
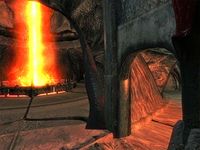
- Falling in the pool of lava in the middle of the ground level will result in instant death.
- Touching the fire pillar in the middle of the room will result in instant death.
Doors and gates:
- There are thirteen doors in/out of this zone
- 1 door (at Out, ground level) leads outside to the Planes of Oblivion
- 2 doors (at A, ground level) lead to Rending Halls
- 2 doors (at B, first level) lead to Rending Halls
- 2 doors (at C, first level) lead to Dead Halls
- 2 doors (at D, second level) lead to Dead Halls
- 1 door (at E, second level) leads to Corridors of Dark Salvation
- 1 door (at F, third level) leads to Corridors of Dark Salvation
- 2 doors (at G, third level) lead to Sigillum Sanguis
Other:
- 1 Blood Fountain at location b on map
- 2 Magicka Essences at locations m on map
Zone 2: Rending Halls[edit]
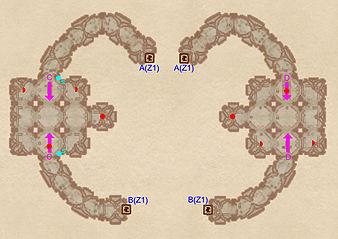
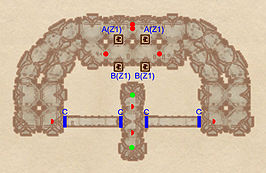
Depending on which door you used to enter this, you have to ascend these halls by either the eastern route, or the western route. The western route has a slight advantage; when you arrive in the large room you can use the Claw Lever to activate both Citadel Trident Blades (there are no Claw Levers on the eastern route) and use them against your enemies.
Occupants:
- 4 Dremora
- 0-2 Daedric occupants (Daedra creatures or Dremora)
- 0-2 Daedric occupants (always best possible level)
Traps:
- 2 Citadel Trident Blades at locations C on map
- 2 Citadel Trident Blades at locations D on map
- 2 Claw Lever (activate Citadel Trident Blades at C) at locations s on map
Doors and gates:
- There are four doors in/out of this zone
- 2 doors (at A) lead to The Flesh Spire, ground level
- 2 doors (at B) lead to The Flesh Spire, first level
Zone 3: Dead Halls[edit]
After you enter these halls you can either use the eastern or western route, but both result in the same destination. After you reach a small you can take a detour through the small corridor. You can find two The Punished in the middle room you arrive in.
Occupants:
- 4 Dremora
- 0-4 Daedric occupants (Daedra creatures or Dremora)
Treasure:
Doors and gates:
- There are four doors in/out of this zone
- 2 doors (at A) lead to The Flesh Spire, first level
- 2 doors (at B) lead to The Flesh Spire, second level
- 4 doors (initially closed) at location C
Zone 4: Corridors of Dark Salvation[edit]
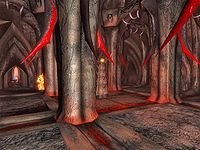
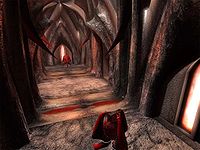
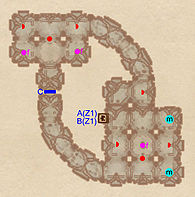
Ascend through these corridors with caution. The projectiles fired by the Fire Turrets can be hard to avoid while confronting the Daedra here. There is little else of interest, other than the two Magicka Essences upstairs.
Occupants:
- 2-7 Daedric occupants (Daedra creatures or Dremora)
Traps:
- 3 Fire Turrets at locations f on map
Doors and gates:
- There are two doors in/out of this zone
- 1 door (at A) leads to The Flesh Spire, second level
- 1 door (at B) leads to The Flesh Spire, third level
- 1 door (initially closed) at location C
Other:
- 2 Magicka Essences at locations m on map
Zone 5: Sigillum Sanguis[edit]
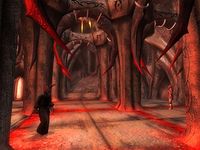
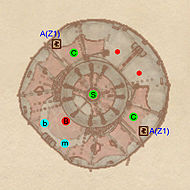
Ascend the ramp and pass through the opening to find yourself in the room that contains the Sigil Stone. Here you can find two Daedra. You can find a Magicka Essences, a Blood Fountain and two boss-level The Punished on the upper levels. Be careful if you are sneaking as the Daedra can spot you easier than you're used to, due to the openness of the area. Once you have reached the top you can grab the Sigil Stone to close the Oblivion Gate.
Occupants:
- 1 boss-level Daedric occupant (Daedra creatures or Dremora) (always best possible level) at location B on map
- 2 Daedra creatures
Treasure:
- 2 boss-level The Punished at locations C on map
- 1 random Sigil Stone at location S on map
Traps:
- Touching the fire pillar in the middle of the room will result in instant death.
Doors and gates:
- There are two doors in/out of this zone
- 1 door (at A) leads to The Flesh Spire, third level
Other:
- 1 Blood Fountain at location b on map
- 1 Magicka Essences at location m on map
