Online:A Walk Above the Clouds
|
||||||||||||||||||||
Quick Walkthrough[edit]
- Talk to Veldrana, and help her light a fire.
- Find the cult cell leader.
- Collect the components and perform the ritual.
- Find and defeat the dragon priest.
- Talk to Centurion Andrin at Forelhost's base.
Detailed Walkthrough[edit]
Near Forelhost, you find Radrase Alen's body. It looks like she was a Worm Cultist who was mauled to death by sabre cats. Inside her pack is a journal.
- "Nordahl showed us the shard of Wuuthrad tonight. It was very impressive! He's shown great cunning to find it. Our brothers and sisters scour the Smokefrost Peaks looking for Ysgramor's legacy."'
- <Continue reading.>
- "He told us his plan to ascend Forelhost, and search the crypts of the Dragon Priests. There was muttering in the ranks. Cowards. Why should we fear the dead? They are like toys to the likes of us!"
Close the journal and continue up the path to search for the shard. As you ascend, snow and sabre cats will begin to cover the mountain. Along the path you will find Veldrana, sitting behind an extinguished fire and leaning against a rock for support. She was tracking the cultists for King Jorunn, but she was attacked bat sabre cats and ran out of wood to keep her fire burning. You tell her you'll gather kindling for her, and she tells you you'll need to stay close to the fires to survive and warns you about the sabre cats.
To obtain Kindling for her fire, you will need to collect fallen branches. The closest usable branches are at the foot of a pine tree a little further north up the path. Return to Veldrana, and light the campfire.
Talk to her as she warms up. She will tell you she saw spells and dark magic, as well as the cultist's leader. Veldrana also says he had some metal object, and that he was left on top of the mountain when the rest of the cultists fled.
Continuing north along the path will lead to a small building containing a ladder to Forelhost. Climbing it will take you to another small outpost, and upon leaving you will have to run quickly to the fire. The cold will slow you and sap your health, but if you don't dawdle you will be fine. By the fire is Nordahl's body, reaching for a book. His body can be examined for further information.
- <The shredded corpse of Nordahl. His injuries don't appear to be from sabre cat claws. If anything, they seem to have been made by human fingernails.>
Take the Grimoire next to him, then read Practical Necromancy. It tells you how to summon a spirit of Aetherius.
To gather more information, you will need to follow the book's instructions to summon the spirit of Nordahl. Start by collecting Animal Hide, Nightshade and an Animus Geode. In a burlap sack at the next camp, you find crushed nightshade. Be careful as you climb the mountain, as unlike the first campfire, later ones only last for a minute before they need to be relit. Directly east of the fifth campfire, the animus geode is inside a broken crate in a large tent. The animal hide is in a backpack at the sixth bonfire.
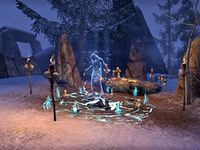
Now it is time to perform the ritual. Nordahl's summoning circle is to the left of the tent where you found the geode. Stepping into the circle will protect you from the cold. You need to light the candles according to the order in the grimoire: east, west, north, then south. If you don't, nothing will happen.
Burn the nightshade into the ritual bowl, place the hide on the mound in the center, then use the animus geode. Upon casting the spell, a necromantic sigil will appear on the ground, and finally Nordahl's spirit will appear. He is bound in place by magical chains around his hands, and his head is bowed.
When you attempt to question him, he will express outrage at your summoning, but seems compelled to answer any questions you ask.
- "Who dares?"
- I summoned you. Tell me what happened here.
- "Why should I … I led a Worm Cult cell here. We planned to loot the ruins. Dragon Priests wore powerful artifacts. Masks. And I wanted one.
Eyes of the King! You used a summoning spell on me!" - Your party all died. How?
- "We died … died to the Draugr. Maggots take your tongue! The unbound dead bested us. We never even saw a Dragon Priest."
- What happened to your shard of Wuuthrad?
- "Ah, that's why you're here! Want it for yourself, do you?
Too bad. The Draugr took it from our corpses. And the temple is sealed once again." - Then I need to get inside.
- "You presume you can defeat the massed dead. And an ancient puzzle will just unlock for you? Amazing.
Scum, the gates of Forelhost are sealed. The cult might have succeeded, had the Draugr not murdered us. You are doomed." - I'll get the shard, and you're going to help me.
- "My spirit is bound to your geode, yes. You can drag me from Aetherius whenever you wish. So do as you will.
I'll laugh when you die."
Upon finishing your conversation with him, he will disappear.
Temple Door Puzzle[edit]
You need to solve an ancient puzzle before you can enter the temple. Nordahl can also be summoned for help, and when talked to will tell you a hint is likely carved into the ornamental runes. There are three carvings in the surrounding area, each with a different inscription. In no particular order, they read:
- <The crude figures carved in the rick wall are Nord runes, not the Dragon-speech elsewhere around the temple. The dialect is archaic, but you distinctly make out the words "center" and "snake.">
- <The crude figures carved in the rick wall are Nord runes, not the Dragon-speech elsewhere around the temple. The dialect is archaic, but you distinctly make out the words "use three" and "different.">
- <The crude figures carved in the rick wall are Nord runes, not the Dragon-speech elsewhere around the temple. The dialect is archaic, but you distinctly make out the words "plumage" and "right.">
The center pillar doesn't need to be adjusted, as it is already set to snake. The pillars must be turned so the left one is a whale, and the right an eagle. The solution from left to right is Whale, Snake, then Eagle.
Enter the temple, and look for the dragon priest. Talking to Nordahl, he will explain that the priest is likely higher on the peak. A thorough search of the temple will prove him right, so continue through to the door to Forelhost Peak.
The cold will be back, so continue to an open area containing an altar and light a campfire. Summoning Nordahl, you can ask him about how to go about defeating the dragon priest.
- "So you found the peak. You'll not live to tell of your discovery!"
- How do I defeat it?
- "It … thrives in the cold. Yes. Look for fires around the altar. Light them before you summon it.
Try to fight it in the cold, you'll end up like me. Then we'd have some fun."
Approaching the altar, you can interact with it to use the animus geode and summon the Dragon Priest Vosis for a fight. When you defeat him, the Wuuthrad Shard sits in the center of the altar.
Return to the outpost with the ladder near the base of the mountain to speak to Veldrana. Upon approaching her camp on the way down, a pair of Pact soldiers and Centurion Andrin will be waiting in the middle of the path. Veldrana is at the side, sitting in a stretcher. She is happy to see you survived in good health.
Upon speaking with Centurion Andrin, he will tell you he was looking for a patrol of Riften guards, but is relieved to hear that they aren't up the mountain and that you have a shard of Wuuthrad. He offers to take the shard off your hands and safeguard it until you need it.
Notes[edit]
- The torches around the mountain peak can be used for warmth, in the same manner as campfires.
- On some builds it will be best to maximize your Health capacity with food and/or with jewelry that has the Healthy trait, and/or to equip jewelry enchanted to increase Health regeneration, especially when you arrive at the start of the path toward the altar of the Dragon Priest at the top of the mountain. Your character also loses less Health from the cold if you sprint while away from a fire, and your Health will recover fully in less time at the next fire.
- Completing this quest is not necessary to reach the Skyshard. It can be accessed either through the Forelhost Crypts by accepting the quest to unlock the crypt doors, or alternatively by using a mount to jump up the rocks to the left of the crypt entrance, bypassing the crypt. This can be done by following the path lit by torches, which function identically to the player-lit fires and to regain Health. At the summit, you can then sprint past Vosis' altar and reach the Skyshard with sufficiently high Health.
- Alternatively, if you are in a group, only one member must accept the quest in order to unlock the Forelhost Crypts doors and gather kindling with which to light the fires.
- If you do complete the quest, the doors to the Forelhost Crypts subsequently remain unlocked, so you can still use either route to get the Skyshard.
Quest Stages[edit]
<Alias=LocationHold>) is dynamically set by the game and will be filled in with the appropriate word(s) when seen in game.
- Not all Journal Entries may appear in your journal; which entries appear and which entries do not depends on the manner in which the quest is done.
- Stages are not always in order of progress. This is usually the case with quests that have multiple possible outcomes or quests where certain tasks may be done in any order. Some stages may therefore repeat objectives seen in other stages.

