Skyrim:Angarvunde (quest)
|
||||||||||||||||
Quick Walkthrough[edit]
- Enter Angarvunde and speak to Medresi Dran.
- Kill three draugr in the main chamber.
- Return to Medresi.
- Follow Medresi.
- Enter Angarvunde Catacombs to open the gate.
- Enter Angarvunde Ruins to open the gate.
- Follow Medresi into the treasure chamber.
- Discover Angarvunde's treasure.
Detailed Walkthrough[edit]
Angarvunde[edit]
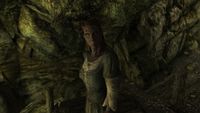
Upon entering Angarvunde, you will encounter Medresi Dran complaining about her cowardly work force who fled as soon as they encountered some undead. Until the path is clear, Medresi is unable to reach the treasure she seeks. If you offer to assist her, she will in turn offer to split the treasure with you.
First, Medresi needs the three leveled draugr cleared from the main chamber. Head down the ramp from Medresi and follow a short corridor; the main chamber is the first large room you come across. Kill the three draugr here and make your way back to Medresi, who will be walking down towards you.
Tell her that the draugr are dead, and she will race off to the main chamber. Follow her to the locked gate at the far side of the chamber. Talk to her, and she will give you a key that will open the doors to the sides of the main chamber.
Head up the ramp on the southeast wall of the chamber and open the door to the Catacombs.
Angarvunde Catacombs[edit]
Follow the path downwards until you reach a broken spiral staircase leading further down. Drop down here, listen to a patrolling draugr to time it when he isn't right there. There is a burial urn next to a broken chair. Follow the path still further down and you will encounter another Draugr in the wide corridor. There is also a trapped chest up the stairs to the left.
Another draugr awaits when you turn the corner to the left. There is a bookcase on your left with clutter and a burial urn. You will then encounter a group of four as you follow the corridor into the burial crypt, one is roaming and the other three are upright in alcoves asleep. There is also a locked chest and a random potion. The corridor will open out into an overgrown cavern containing a single draugr, four giant Canis Roots and an unlocked chest, behind the first Canis Root on your left as you enter you will find a Corundun vein as part of the wall. Exit this cavern to the left, in front of you is a random potion, continue following the path. Watch for the dart trap on the floor halfway up the stairs, past a burial urn on your left. There is another dart trap halfway up the second set of stairs. Both traps are easily avoided by waiting for the darts to stop and neither seemed to reset. You can use the second trap to your advantage dealing with the draugr which is patrolling here.
You will emerge in yet another overgrown cavern containing two draugr. after turning the corner to the right on the top alcove of the second set of alcoves on the left is a petty soul gem, and just after this on the same side are three burial urns. Turn to the left and the last alcove on the left before the stairs is another burial urn. Half way up the stairs there are a couple more burial urns. Several draugr may awake from their slumber here, so be careful. Make your way through the next two large burial chambers and you will reach the door back to Angarvunde. Just before the door there is an urn on the right and a corner table on the left with a random potion and Wraith's Wedding Dowry book.
Head straight to the end of the corridor, past a couple of urns and an unlocked chest and pull the lever. The spikes to your left will lower, allowing you back into the main chamber and opening the first gate. Head up the stairs on the northwest side of the main chamber to access Angarvunde Ruins.
Angarvunde Ruins[edit]
Follow the winding corridor down two flights of stairs. Directly at the foot of these stairs is a corridor containing four trap triggers on the floor, which will release swinging blades if activated. The next room contains a solitary draugr, and iron door concealing a couple of standard burial urns, and a number of paths blocked off by spikes. There is also a copy of the Illusion skill book Before the Ages of Man on the table. There is also a locked chest behind the table in the corner.
Continue through the only available path into a two-leveled chamber containing two draugr. Follow the upper pathway around to the right and jump across the crumbled bridge to reach a magicka poison on a pedestal—be warned, though, that this will release a spike trap from the ceiling. Heading downstairs and up the path will bring you face-to-face with yet another draugr, and eventually will lead you to the other side of one of the blocked paths encountered earlier. Pull the lever here to release two sets of spikes—one containing a locked chest, the other leading you back into the first room.
Directly opposite, you will see that the third set of spikes has also retracted. Head down the pathway they have revealed. At the foot of the stairs and round the corner to the left, there is a floor trigger for a battering ram overhead, and another two draugr.
Two more draugr will spring from the upright coffins on your left as you enter the next three-leveled chamber. Claim the healing potions between them if you wish. On the opposite side of the room there is an unlocked chest, an urn and a burial urn. Veer right and up the stairs to find a path that will bring you to the third tier of this chamber. One draugr awaits in the center of the bridge.
In the room directly beyond the bridge, there is a bookcase to the right containing some potions and leveled armor and three burial urns. Further down the stairs and along the corridor, there is also a leveled weapon, some coins, a ruby (maybe random gem) and a coin purse beneath three black statues in an alcove. Deal with the final draugr on the stairs to the right, at the top of the stairs there is another burial urn next to a brazier. The door leads back to Angarvunde. Once through the door there are a couple of burial urns, and magicka potions on your right, then walking towards the lever to lower the spikes you will pass an urn and an unlocked chest on your left.
Medresi's End[edit]
Head left to the end of the corridor to find a chest and a lever. Pull the lever to lower the spikes to your right and open the final gate. Jump down and walk towards Medresi, who will excitedly run through the open door, only to be killed by a crushing spike trap. Luckily for you, her activation of the trap also reveals a pathway down.
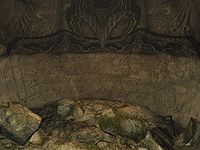
The chest contains a coin purse and a broken steel sword handle. Head down the revealed stairway to find the real prize—a word wall for the Animal Allegiance shout, a boss-level chest, and an enchanted two-handed weapon.
Notes[edit]
- If you have a follower, they may not follow you all the way down the spiral wood staircase within Angarvunde Catacombs. Because the staircase has broken away at the bottom, you must drop down a few feet to reach the ground below, and your follower may remain stuck on the staircase. In this case, you will be forced to clear this area alone, and your follower can be found back in the main chamber when you return to open the gate.
- This can be solved by waiting, as all followers are loaded next to you afterwards.
- You can also use the Unrelenting Force shout to push them down.
- You can tackle the Catacombs or the Ruins in either order once you receive the key from Medresi; however both levers must be activated before the final chamber can be reached.
- If Medresi Dran's body gets stuck on top of the trap, climb on top of one of the carvings with a face and jump to her, or use the unrelenting force shout to knock her off.
- Only Medresi can trigger the final trap. If you beat her to it, you and your followers cannot trigger it before she arrives. There is therefore no way to complete the dungeon without letting her die (or using console commands).
Bugs[edit]
- If you pickpocket the key from Medresi and explore the Catacombs and Ruins sections without the relevant quest, Medresi will stand in front of the open gates, insisting that they need to be opened.
-
The Unofficial Skyrim Patch, version 1.3.1, fixes this bug.
- To fix this, talk to Medresi so that she "gives" you the key, then re-enter both the Catacombs and Ruins by their exit doors, and re-trigger both levers.
- Killing Medresi will also trigger the final trap and advance the quest.
-
- The Questmarker is on Medresi, the Journal tells you to talk to her after opening the big gate, but she still tells you that there is only one door left to open. ?
Quest Stages[edit]
| Angarvunde (dunAngarvundeQST) | ||
|---|---|---|
| Stage | Finishes Quest | Journal Entry |
| 10 | Objective 10: Destroy the Draugr in Angarvunde (<Global=dunAngarvundeDraugrKilledCount>/3) | |
| 20 | Objective 20: Talk to Medresi in Angarvunde | |
| 50 | Objective 50: Find a way to open the gates | |
| 61 | Objective 61: Open the other gate | |
| 62 | Objective 62: Open the other gate | |
| 70 | Objective 70: Return to Medresi | |
| 100 | Objective 100: Discover the treasure of Angarvunde | |
| 254 | (All objectives completed) | |
- The following empty quest stages were omitted from the table: 0, 5, 30, 35, 40, 55, 56, 60, 65, 66, 71, 80, 255.
- Any text displayed in angle brackets (e.g.,
<Alias=LocationHold>) is dynamically set by the Radiant Quest system, and will be filled in with the appropriate word(s) when seen in game. - Not all Journal Entries may appear in your journal; which entries appear and which entries do not depends on the manner in which the quest is done.
- Stages are not always in order of progress. This is usually the case with quests that have multiple possible outcomes or quests where certain tasks may be done in any order. Some stages may therefore repeat objectives seen in other stages.
- If an entry is marked as "Finishes Quest" it means the quest disappears from the Active Quest list, but you may still receive new entries for that quest.
- On the PC, it is possible to use the console to advance through the quest by entering
setstage dunAngarvundeQST stage, wherestageis the number of the stage you wish to complete. It is not possible to un-complete (i.e. go back) quest stages, but it is possible to clear all stages of the quest usingresetquest dunAngarvundeQST.

