User:Biffa/sandbox/3
|
|||
|---|---|---|---|
| # of Zones | 1 | ||
| Clearable | Yes | ||
| Dungeon | Yes | ||
| Respawn Time | Never (storage is safe) | ||
| Level | Min: 25 | ||
| Occupants | |||
| Dwarven Automatons, Reavers | |||
| Console Location Code(s) | |||
| DLC2Kagrumez01, DLC2KagrumezExterior01 | |||
| Region | |||
| Solstheim | |||
| Location | |||
| South of the Temple of Miraak North of Ramshackle Trading Post |
|||
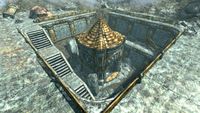
3 is a relatively small Dwarven ruin south of the Temple of Miraak.
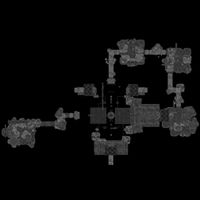
The main chamber is in the format of an arena. A pedestal lies in the center with a 3x3 grid for Kagrumez resonance gems. There are three doors in the ruin with three different patterns on them for the receptacle. Placing the gems in the pedestal in these patterns will trigger colosseum-style death matches in which you will be locked in the main chamber and various Dwarven automatons will attack you. The round is over when all automatons have been destroyed. The second and third rounds have environmental hazards as well.
The first door requires two resonance gems. Past the first door is a steadfast Dwarven spider, a potential follower. The second and third doors require three and four respectively. Beyond the second door is the steadfast Dwarven sphere, another potential follower, and beyond the third door is the unique Dwarven Black Bow of Fate.
There are five Kagrumez resonance gems in total. Two resonance gems can be found on the reavers in the main chamber. Another can be bought from Revus Sarvani, who camps near his silt strider north of Tel Mithryn. One more can be found inside Nchardak during the main quest. The last gem can be found at the end of Fahlbtharz. Only four gems are ever needed, so it is not necessary to do the main quest in order to clear this ruin.
Related Quests[edit]
- The Kagrumez GauntletDB: Survive the Kagrumez trials to claim a unique prize.
Exterior[edit]
Inside the large tent by the top of the stairs is a piece of bent dwemer scrap metal, a Dwemer bowl, a dwemer pan, a large dwemer strut, a knapsack and a bed roll.
Notes[edit]
- You can only have one Dwarven mechanical follower.
- This ruin also has three small areas off of the main chamber that are accessible to the player. The third area, to the south, can be accessed with Whirlwind Sprint (use the shout while on the observation platform looking down on the proving grounds), but it is a dead end with nothing in it.
- The other two areas (northwest and northeast) can be reached by using Whirlwind Sprint from the observation platform to a pipe ledge in the center of proving ground, then using Whirlwind Sprint from there to the northeastern area. Another Sprint across will get the player to the northwestern area. These areas, like the one to the south, come to a quick dead end at bronze gates (most likely the spawn areas for Tempered Spheres/Ballistae during the trials).
- There is nothing behind these bronze doors. Using the plate glitch will cause the player to clip out of the map, and eventually re-spawn at the entrance.
Bugs[edit]
- The Dwarven automaton followers occasionally do not spawn. ?
- Sometimes Dwarven automatons get stuck in their spawn alcoves around the main arena.

