Online:The Study of Souls
| This page is currently being rewritten as part of the Online Quest Project. The page is being both written and checked. All users are welcome to make changes to the page. If you make a change that is relevant to the project, please update this template accordingly, and make sure you have observed the project guidelines. Detail
Quick Summary: written by MolagBallet, not checked
Quest Stages: written by HoodBot, checked by MolagBallet |
|
Quick Walkthrough[edit]
- Find a way in to the Library of Arkthzand.
- Read The Library of Arkthzand and navigate the void portals.
- Explore the library.
- Deactivate the containment apparatus using the Void Crystals.
- Talk to the shade.
- Enter the orrery.
- Talk to Arana.
Detailed Walkthrough[edit]
Enter the Library of Arkthzand[edit]
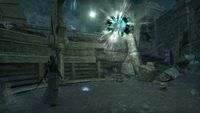
Lady Belain has the Arkthzand keystone. Verandis wants to enter the Dwarven structure southwest of Bthar-Zel and chase after your adversaries. Meet him in front of the ruin. One way to reach it is to head southeast of Bthar-Zel and point your cursor at the green portal thing on the cliff, known as a Void Anomaly. When you use the prompt to interact with it, you'll be teleported up. Teleport up the next ledge and climb across the ridge, heading west. There's a broken bridge with a skyshard and a Dwarven Centurion on it. Ghostlight Grotto lies to the west, and another Void Anomaly is across the bridge. Use it, and meet up with Verandis in front of the Library of Arkthzand.
The library's front entrance is locked. Verandis notes that Dwarven constructs and shadowy figures are prowling the grounds. Your next task is to try to find a way inside the ruin. Head south along the path in front of the library's front foyer and make a right turn at the first bend. Head up the stairs here, west of the front of the library. You'll find a door blocked by a pile of rubble with a green Void Anomaly in front of it. On the floor is a note. Read the note, which was written by a Gray Host pentarch. The note says that Lady Belain was previously isolated for centuries, and that she brought Rada here. Lady Belain is trying to awaken a dark relic, which has created strange energy pockets which can be used to travel short distances, and reach otherwise inaccessible locations. The note calls the Void Anomalies you used earlier "void portals".
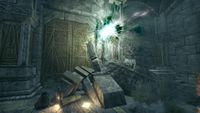
Speak with Verandis about the contents of the note, and head back around the front of the library, to the east. Head north once you're in front of the structure. You'll notice a considerably large pile of rubble with many void portals above it. Another note, entitled Void Portals, is on the ground beside a sledge hammer. Read it. The pentarch discovered small pieces of shardlike material that appears to originate inside the darkness. He approached an energy pocket with the shard, and found that he had gone through a void portal.
After you read the note, Verandis will point out a strange object on the ground. Pick up the Void Shard and speak with the count about your findings. He tells you to avoid the larger void anomalies in favor of the smaller, white void portals. There's a white void portal atop the cliff northwest of you. Look at it and use the prompt to teleport up to it. Continue west and head through another void portal. Your way into the library is just up ahead.
Inside the Library[edit]
Speak with Verandis once you've entered the library, then head through the hallway to the west. Shades and Dwarven Architons are scattered throughout the library. The path ends in the western room, but there are void portals and a door up on the ledges above you.
Walk forward and head through the lowest portal on the west side. Head up the stairs to the right, and jump on to the staircase to the northwest once you reach the top. You're now at the very top of the western stacks. Walk north a short ways, then turn around and use the void portal above you to the south. fall to the ledge just below you, to the south. Walk to the south of this platform and use the void portal southeast of your location, then warp to the portal northeast of your location. Head as far north as you can muster and use the void portal past the rubble-covered stairs. Then, head along the ridge south and enter the door to the Containment Chamber, which Verandis feels a dangerous presence coming from.
The Containment Chamber[edit]
There's a containment apparatus with a shade trapped in an anomaly. It appears to be suffering. Find a way to set it free. There's a note on the ground in front of the first three Void Crystals in front of the entrance. Read about The Containment Apparatus. The pentarch got trapped by the pull of the void portals as he fiddled with the crystals, which alter the apparatus. Speak with Verandis about the puzzle. Verandis deduces that the shade trapped in the apparatus is the pentarch who wrote the note, and suggests freeing him to interrogate him about what he knows.
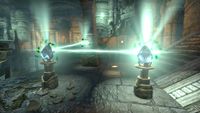
You can rotate the crystals to manipulate the void energy. Rotate the western crystal (the one closest to the containment chamber's entrance) once to redirect the flow of void energy from the wall to the crystal southeast of it. Next, head to the crystal southeast of the entrance and rotate it twice to connect it to an apparatus in the southwest corner of the room. You're going to want to rotate the crystals to channel void energy into three other apparatuses in all four corners of the room. Use the void portal on the platform in the southwest corner to rotate the void crystal in the apparatus. You'll want to rotate the crystal twice. Jump back down to the southern platform and rotate the crystal closest to the southern wall four times.
Now that you've got the apparatuses in the southwest and southeastern corners activated, you'll need to activate the northern corners. Use the void portal to reach the southeastern apparatus and rotate the crystal twice. Then, jump down to the eastern platform and rotate the crystal you connected with the southeastern apparatus, and rotate it seven times. The crystal is connected with another on the northern platform. Head over there and rotate that crystal four times to reach the northeastern apparatus, then use the void portal and rotate the crystal until it connects to a crystal near the center of the prison. Rotate the central crystal until it connects with the northwestern apparatus, and the Shade will be set free.
Speak with the Shade before it dissipates. His name is Pentarch Cievernes, and he claims that something old and hungry has awoken. The pentarch says Lady Belain is a "vessel that never fills", corroborating Verandis's earlier claim that he felt a certain emptiness within her when he should have sensed her vampiric condition. She seeks to awaken something called the Dark Heart, and "drinks the shadows" when it beats. Pentarch Cievernes says that Lady Belain is in Arkthzand's Orrery at this very moment. Talk to Verandis, then exit the containment chamber through the door to the east.
The Orrery[edit]
Gray Host banners have been hung in the hallway ahead. Take the lift at the eastern end of the room up to the orrery's Observation Deck. Rada al-Saran and Lady Belain are talking below. They seek to reactivate the orrery, but Lady Belain wants the Dark Heart reawakened before they do so. Speak with Verandis about the conversation you overheard. He tells you to return to Rebel's Retreat and speak with Arana about your next steps while he stays here and investigates further. Do so, and Arana rewards you for your part in learning the Gray Host's plans.
Quest Stages[edit]
<Alias=LocationHold>) is dynamically set by the game and will be filled in with the appropriate word(s) when seen in game.
- Not all Journal Entries may appear in your journal; which entries appear and which entries do not depends on the manner in which the quest is done.
- Stages are not always in order of progress. This is usually the case with quests that have multiple possible outcomes or quests where certain tasks may be done in any order. Some stages may therefore repeat objectives seen in other stages.
| Prev: Blood of the Reach | Up: The Reach | Next: The Awakening Darkness |


